
Instrument Carrying Case Guide: Foam Density, Dividers & Sample Testing

A fast way to end up with field damage is to specify an instrument carrying case by outer dimensions alone. You need three things before bulk production: foam density matched to loaded weight and fragility, a divider layout that prevents internal collisions, and sample-test evidence that shows the loaded case survives the way your customer will actually carry it. This guide walks through the decision sequence that connects foam type to the final sample approval checks.
An instrument carrying case is not a consumer backpack with more padding. It is a protection system: the shell resists abrasion and puncture, the foam or dividers control movement, and the handle/zipper system carries the full loaded mass without tearing. If any one of those fails, the whole case fails. Most field failures in this category trace to three avoidable mistakes—choosing open-cell foam for a heavy instrument, letting batteries sit next to a screen, and approving a sample without a loaded fit photo.
Use this guide to build a quote-ready specification, evaluate a manufacturer's ability to cut and assemble foam correctly, and approve or reject a pre-production sample with hard evidence instead of feel.
Quick Answer / 30-Second Instrument Carrying Case Decision
For most industrial instruments and specialty equipment, the safest starting point is a semi-rigid or reinforced soft case with a closed-cell polyethylene (PE) foam insert for the main body, plus a separate open-cell polyurethane (PU) foam or divider layer for screen-facing or scratch-prone surfaces. Do not rely on one universal foam. Heavy gear compresses soft foam; delicate optics bounce against rigid foam. Specify around the loaded case weight, not the empty case.
Then move through this sequence before ordering bulk: measure the actual instrument including protrusions → map every accessory and assign zones → choose foam type and density range → force the supplier to confirm handle attachment and zipper route → request loaded fit photos plus a buyer-defined pull test → freeze a golden sample. Everything else in this article supports that sequence.
If you're only buying a generic messenger bag with a foam pocket, this guide is overkill. If you're shipping a fragile sensor, a calibration tool, or an instrument that cannot be re-certified cheaply, this is the exact level of detail that separates a usable field case from a warranty problem.
Scope of This Guide
This page covers soft and semi-rigid protective carrying cases for industrial instruments, electronics, and specialty equipment. It focuses on the upstream manufacturing decisions a B2B buyer must make: foam selection, divider architecture, structural reinforcement, sample testing, supplier verification, and RFQ content.
It does not cover molded hard cases with CNC-cut foam made from a pre-molded shell, although many of the same density and testing rules apply. It also does not cover generic consumer backpacks, travel luggage, or decorative totes.
Why Standard Bags Fail for Sensitive Instruments
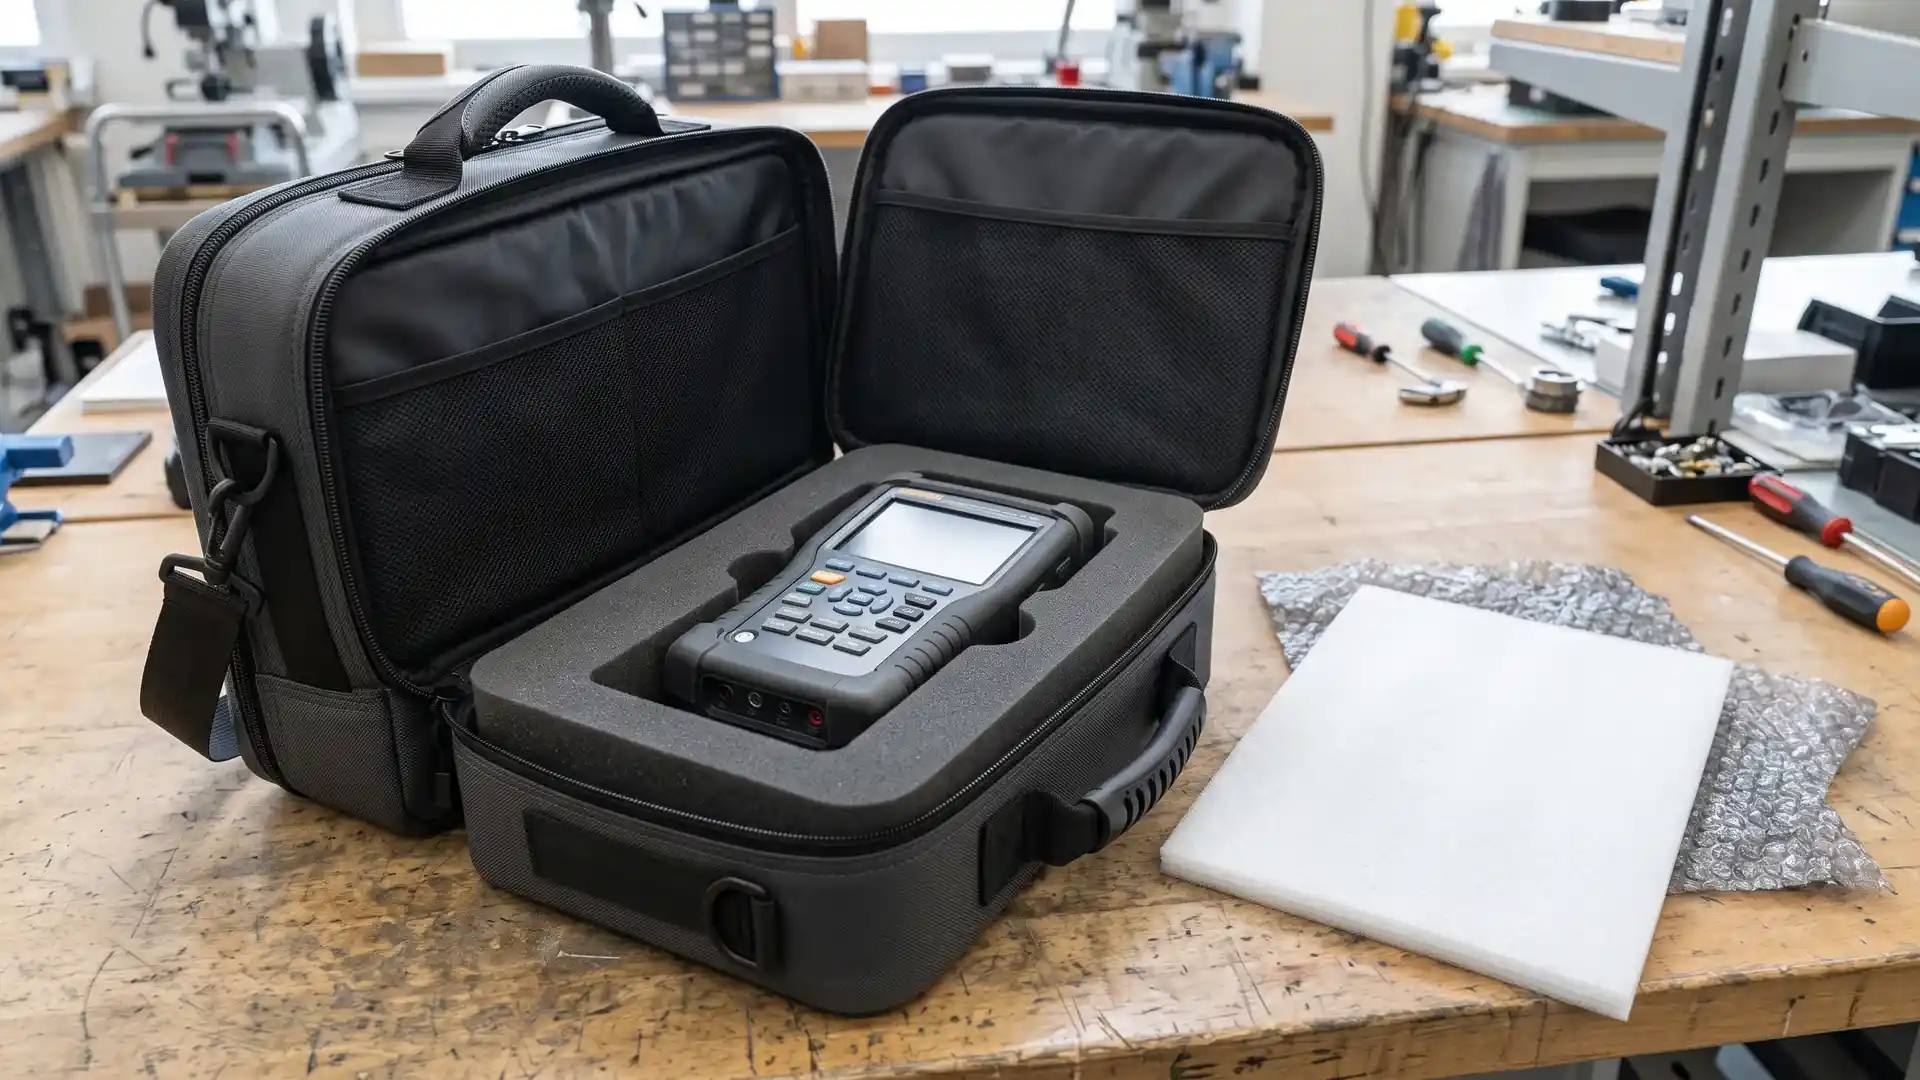
A common sourcing pattern starts with a well-known camera insert or a generic padded laptop bag that the buyer assumes will work for a field instrument. It usually doesn't, and the reason is physics more than quality. Standard padding is designed for a narrow weight range and an average object shape. A heavy instrument with concentrated weight at the base will compress soft foam until the device touches the shell or the bottom seam. When that happens, the padding is not absorbing impact anymore; it is transferring it.
Standard bags also fail on load distribution. If the instrument is dense but small, the entire mass moves to whichever corner is lowest during transport. In a padded flat bag, the device slides to that corner and slams against stitching or a zipper end. A proper instrument carrying case solves this by cutting a cavity that matches the device dimensions so the instrument cannot gain momentum inside the case.
The third failure is internal accessory collision. Cables, probes, chargers, and batteries live in the same volume as the device. Without defined dividers, a battery pack will scratch a screen, a metal probe will dent a housing, or a cable will wedge into a connector port. The fix is not more padding; it is removing free movement altogether.
Put bluntly: if a generic bag passes your test with a handshake, it should not have been the test. The commercial risk is not the bag cost—it's field support, replacement shipping, and a brand looking careless in front of a technical buyer.
Specifying Foam Density: PU vs. PE vs. XLPE
Foam density is one of the first technical questions a qualified supplier should ask, and one of the first places a spec goes wrong. Foam density measures the weight of foam material per unit volume—normally pounds per cubic foot (PCF) in US-influenced specifications or kilograms per cubic meter (kg/m³) in metric markets. Higher density generally means more polymer per unit volume, better compression resistance for a given thickness, and better recovery after repeated loading. It does not automatically mean the foam feels firmer. Cell structure matters more for cushioning behavior.
There are two practical families for an instrument carrying case: polyurethane (PU) foam and polyethylene (PE) foam. PU is typically open-cell, meaning air moves through it and recovery is gradual. That makes it excellent for delicate optics, calibration tools, and light electronics where you want the foam to absorb motion rather than transmit it. The downside is moisture absorption and lower resistance to prolonged heavy compression. PE is typically closed-cell, meaning it resists moisture, holds its shape under heavier load, and performs better when equipment sits in the same cavity month after month. PE is harder to carve with fine detail, but it is the more durable choice for industrial gear.
Cross-linked polyethylene (XLPE) is a subset of PE with stronger cell structure, better chemical resistance, and a cleaner cosmetic finish. Buyers often specify XLPE when a medical, lab, or presentation environment requires the foam to look stable and hold up under repeated cleaning. It tends to be more expensive and may require different tooling for cutouts, so treat it as a specification choice, not a default.
Use the table below as a working reference before writing a tech pack, then confirm the exact grade and technical data sheet with the supplier.
| Foam Type | Cell Structure | Common Planning Density Range | Best For | Key Limitation |
|---|---|---|---|---|
| PU foam | Open-cell | 1.0–3.0 PCF (≈16–48 kg/m³); supplier-confirmed grade required | Delicate optics, light electronics, calibration instruments | Absorbs moisture; compresses under sustained heavy load |
| PE foam | Closed-cell | 2.2–4.0 PCF (≈35–64 kg/m³); supplier-confirmed grade required | Heavy tools, industrial instruments, high-wear field gear | Can feel rigid for fine-pitch or scratch-prone surfaces |
| XLPE foam | Closed-cell, cross-linked | Supplier-confirmed; commonly higher-density grades | Medical devices, lab instruments, clean presentation cases | Higher material/tooling threshold; overkill for light kits |
These ranges are planning references, not universal production values. The actual foam grade depends on the foam supplier, block yield, thickness, and test method. Ask for a technical data sheet or material grade confirmation before freezing the foam spec; do not rely on a density label alone.
A few practical rules. If the loaded case weight is modest and the device has a screen, lens, or calibration surface, start with PU or PU-facing pads. If the loaded case weight is high or the user will stack cases in a van, start with PE for the structural cavity and line the contact faces with PU. If the instrument must survive drops onto concrete, specify a thicker PE perimeter and ask the supplier what drop-height and impact-cycle evidence they can provide—without inventing an IP-style rating the case doesn't have.
Also confirm compression set, indentation force deflection data for PU, and edge finish. These are supplier-confirmed properties, not universal numbers. A factory that says "foam is foam" is telling you they don't control the raw material. A serious manufacturer should ask about loaded weight, fragility, temperature exposure, and whether the foam needs anti-static or moisture-resistance properties.
Divider Architecture & Accessory Layout Planning
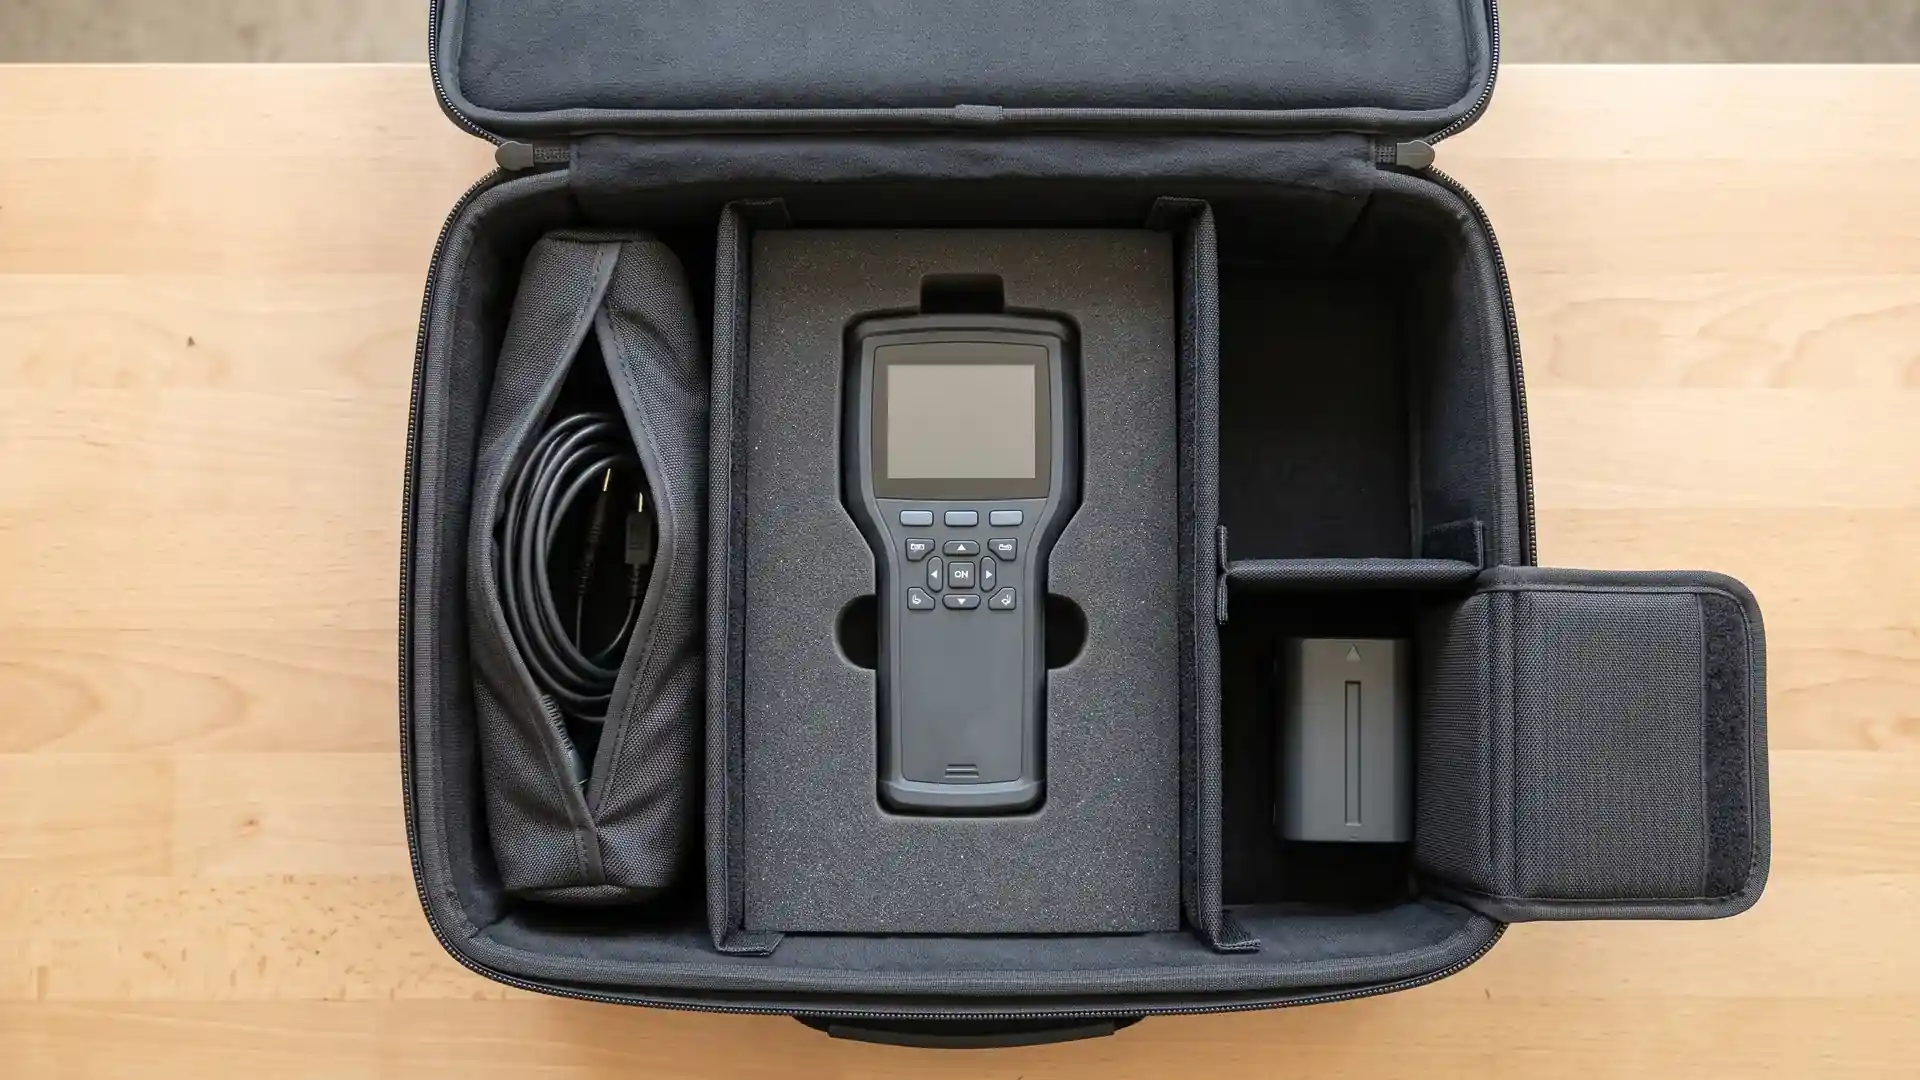
After foam, the biggest failure is accessory layout. You can specify perfect foam for the main body and still get field damage from a stray battery pack sliding against a display. Divider planning should happen before the exterior panel design is finalized, not after.
Start with this rule: assign every accessory a home and keep heavy accessories away from sensitive surfaces. A battery or charger belongs in the lower third near the carry handle, never above a screen or lens. Cables can sit in a flexible pocket, but only if they cannot migrate into the main cavity. Probes and sharp-angled adapters need their own reinforced sleeve or foam slot.
Divider options are removable, sewn-in, hook-and-loop, and foam-cut. Each has a trade-off:
- Removable dividers give the user flexibility but can shift under repeated vibration if the hook-and-loop is weak or the fabric base slips. Ask for a loaded shake test or specify a firmer hook-and-loop backing.
- Sewn-in dividers are stable and low-cost in normal soft cases, but they cannot adapt if the buyer adds a new accessory model later.
- Hook-and-loop dividers are the standard middle path for field kits where accessories change between deployments.
- Foam-cut slots are the most stable because each item has a dedicated cavity, but they are tooling-dependent and may lock you into one accessory set.
A practical default for many field kits is a hybrid: a foam-cut cavity for the primary instrument, one reinforced sleeve for large cables, and one padded zip or flap pocket for chargers and adapters. Every zone should be defined on a two-dimensional map before you approve the sample.
When writing the RFQ, include the accessory list and sketch the intended zones even if the sketch is rough. It is cheaper to fix a divider map on paper than to re-cut foam tooling after the first sample.
Structural Reinforcement: Handles, Zippers & Drop-Risk Control
The foam and dividers are only as good as the exterior structure. For an instrument carrying case, two components usually fail first under load: the handle attachment and the zipper route.
Handle failure is rarely the handle fabric itself. It is usually the stitching, the webbing anchor, or the way the handle transfers stress to the shell. For a loaded case, ask the manufacturer to show the handle attachment in the sample: cross-stitching or box stitching at the anchor, webbing that runs into the shell rather than ending at the top edge, and a reinforced backing panel or riveted connection where the bag material allows. If the handle is only bartacked to a single layer of shell fabric, reject it or require load-rated reinforcement. For heavier equipment, a shoulder strap is not an automatic substitute; it adds a second stress path and needs the same anchor disclosure.
Zippers fail when they are specced for a wardrobe bag and used for a loaded instrument case. The zipper route matters as much as the zipper model. If the opening forces the user to drag the device across the zipper teeth, that's a design error. Check the opening angle and corner movement: the lid or flap should open far enough that the instrument can be lifted out vertically without forcing. Also check the puller clearance—if the puller digs into the foam or catches on the lid when closed, it can damage the foam edge over repeated use. Before writing zipper requirements, review the failure modes in depth in Why Zippers Break: Material, Design, Stitching & Quality Issues Explained.
Drop-risk control is a system, not a claim. The case should be specified around the most likely carry and drop scenario: hand-carry, shoulder carry, van floor, or nested inside a larger crate. If the instrument can be placed upside down inside the case, specify a low-profile internal anchor or a fitted lid pad so the device doesn't slide out on opening. None of this makes a case "drop-proof." It reduces the probability of damage in defined conditions.
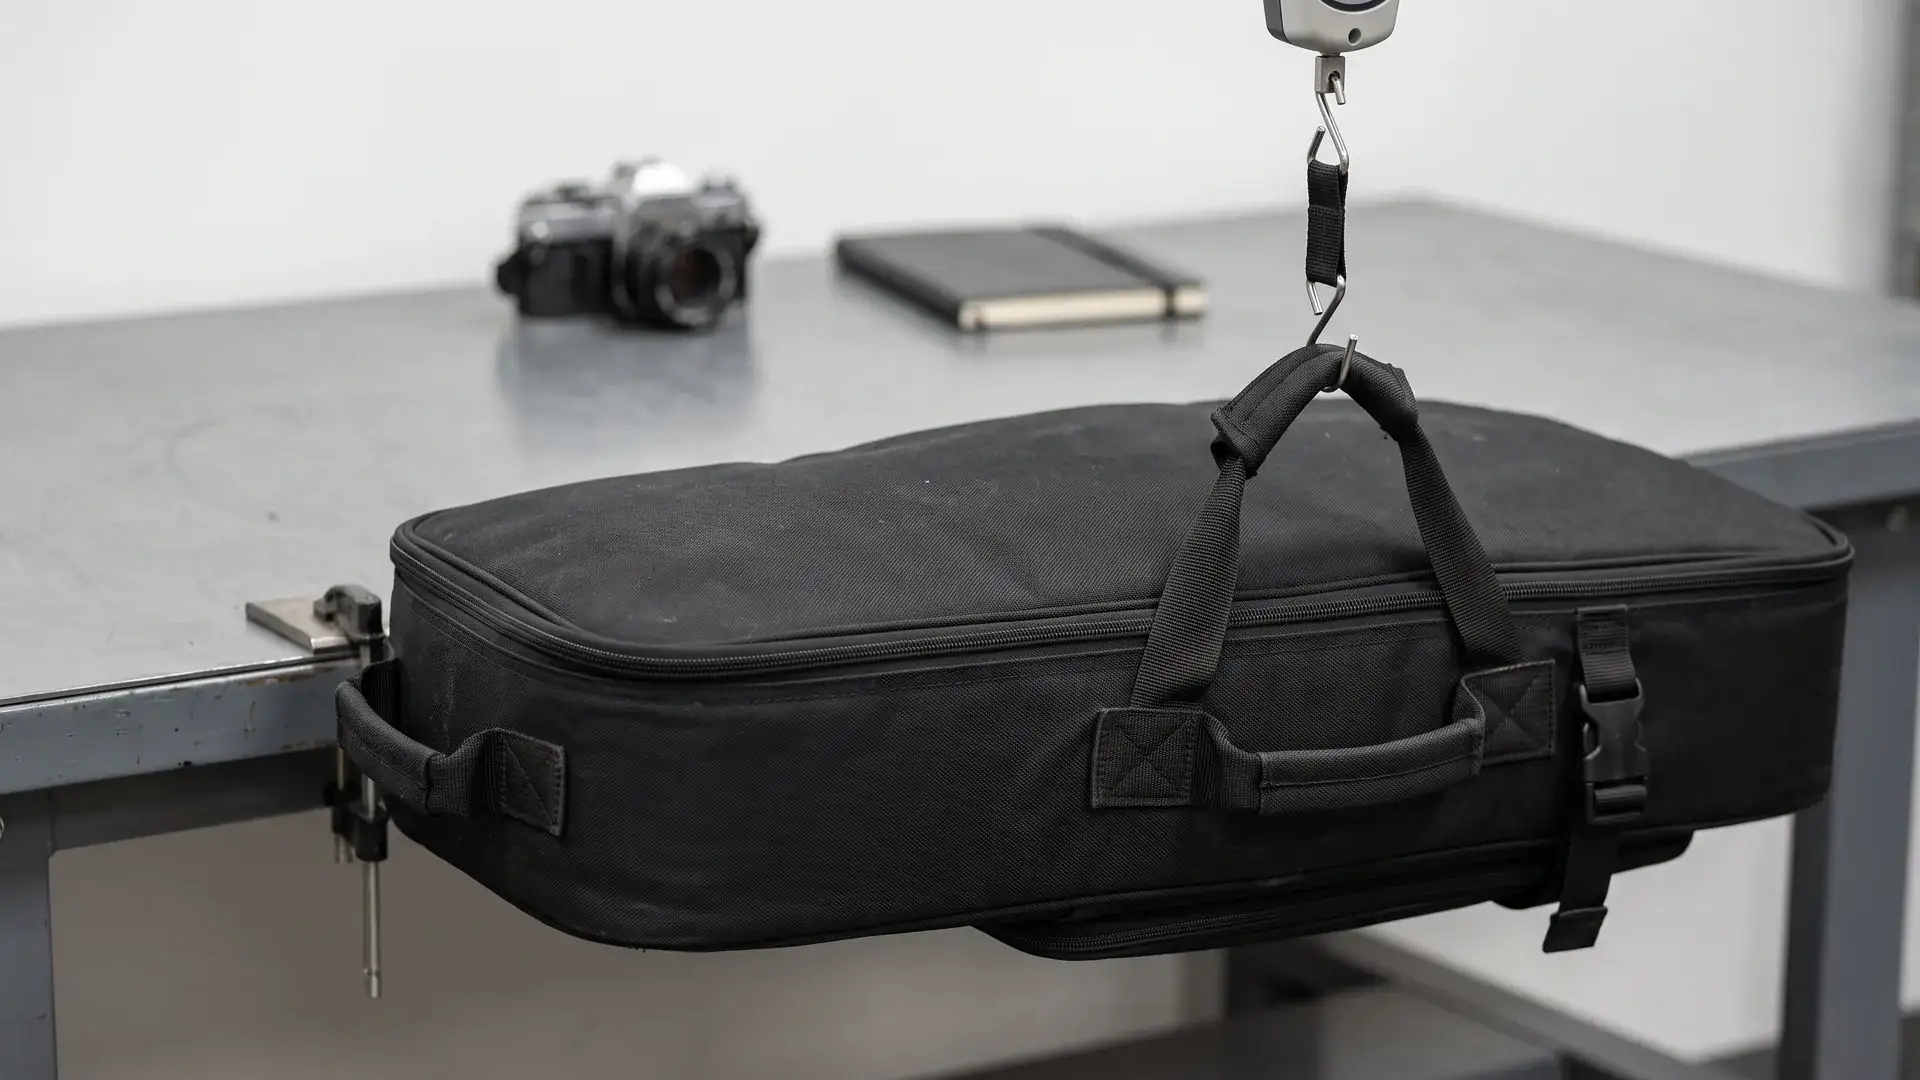
A common supplier response is "our standard case is fine." That may be true, but you need evidence in the sample. Ask for a loaded lift photo or buyer-defined pull test on the handle, a zipper movement test with the actual loaded device, and a visual check of the stitch lines at the anchor points. If the manufacturer cannot produce that, you have not verified drop-risk control—you've only imagined it.
Pre-Production Sample Testing & Approval Checklist
The pre-production sample is the most reliable chance to catch most instrument carrying case failures before they become a full production run with the same problem. The key is to test the case loaded, not empty. An empty foam insert usually feels fine. A loaded one shows you whether the cavity is too tight, too loose, or aligned wrong.
Before you even receive the sample, ask the manufacturer to send loaded fit photos from three views: top, side, and lid-closed. The top view shows whether the instrument sits centered in the foam cutout. The side view shows whether protrusions press into the lid or bubble the shell. The lid-closed view, especially from the front and corner, shows whether the closure distorts or the zipper is under tension. Do not approve based on supplier-assembled studio photos of an empty case.
The checklist below is designed as a pass/fail gate. Every check should have a pass condition, not just a "looks good."
| Check | What to Verify | Pass Condition | Evidence to Keep |
|---|---|---|---|
| Instrument fit | Device fits cavity without forcing or slop | Device inserts straight; no more than supplier-agreed lateral movement; protrusions clear the lid | Loaded fit photos, top/side/lid-closed |
| Accessory zone clearance | Cables, probes, batteries stay separated | Heavy items do not touch screens, lenses, or connectors during shake/lift test | Divider map + loaded photo |
| Zipper movement | Door opens around corners without forcing instrument out | No contact between zipper teeth and device; puller rides smoothly | Video or sequential photos |
| Handle attachment | Loaded lift with the intended full weight | No tear, no seam pop, no anchor stretch beyond supplier-approved tolerance | Loaded pull test photo/video, pull force noted as buyer-defined |
| Foam edge finish | Cutouts are clean and edges not fraying | No ragged foam edges contacting device; no loose foam debris | Close-up photo |
| Divider stability | Lift and shake per defined usage | Dividers stay in position; hook-and-loop does not separate | Shake/lift test notes |
| Packing method | Polybag, insert, carton, barcode, label position | No pressure points from folded case or wrong carton size | Pack-out photo or carton spec |
If the sample fails any check, do not sign off and do not let the supplier "fix it in production." Fixing in production without a corrected sample is how you get a container of cases that all share the same flaw. The correct sequence is: document the failure, request a revised sample or written correction plan, re-test, then freeze a golden sample. That golden sample is the reference for bulk inspection. If the topic is new to you, the wider sampling pitfalls outlined in Sample Order Mistakes in Bags and Luggage: What B2B Buyers Should Avoid Before Bulk Production are worth reading before you commit to a production order.
One QC point that sounds obvious but gets skipped: keep a copy of the approved sample in your office, not only at the factory. Bulk inspection against a factory-held sample only works if that sample is the same revision you approved. Without a golden sample you can access, final inspection becomes a subjective argument. For the final shipment stage, review Common QC Mistakes Buyers Ignore: A B2B Bag Inspection Guide Before Bulk Shipment to avoid routine oversights.
Supplier Verification for Instrument Carrying Cases
Not every bag supplier can build a proper instrument carrying case. You need to verify whether the factory controls foam cutting and divider assembly in-house, or whether it buys a generic insert and drops it into a standard bag. Both routes can work, but the responsibility mapping changes.
Ask direct questions before you invest in sampling:
- Who cuts the foam insert and how is density controlled between production lots? A supplier that buys pre-cut foam from an outside vendor should still be able to show the grade, density, and repeatability record.
- Does the factory have a pattern or template process for divider placement, or is divider location left to the sewing operator? If left to the operator, the bulk layout can drift from the sample.
- What is the pre-production sample policy? A reliable manufacturer should provide a sample that matches the target construction and should not send an empty shell from a different line.
- How are handle anchors and zipper routes stress-tested? Ask for the specific tool or test method used, even if the buyer later defines the pass criteria.
- Can the supplier document material substitutions? If PE foam is out of stock, the buyer needs to know before production, not after shipment.
There's also a red-flag dimension. If a supplier answers every technical question with "no problem" and never asks for instrument dimensions, accessory weight, or carry scenario, treat that as a warning. A competent factory should ask for the data because the answer changes the construction. For a broader set of checks before shortlisting, see 15 Red Flags to Identify Unreliable Bag Manufacturers Before You Order.
The buyer's verification doesn't end with the quote. A quote is a business statement; a pre-production sample is an engineering statement. Require both before committing to bulk production.
RFQ Preparation for Instrument Case Manufacturers
A weak RFQ is the most common cause of a supplier sending you an off-target quote. If you write "need a case for a sensor," you will get prices for everything from a pencil pouch to a molded flight case. If you write the fields below, you get a comparable, technically grounded response.
Use this format as a starting point. Not every field applies to every project, but the more complete the RFQ, the less time you spend untangling quotes.
| Field | What to specify / confirm |
|---|---|
| Bag type | Instrument carrying case, equipment carrying case, foam insert case, protective carrying case, or custom instrument bag |
| End-use instrument | Exact device name or system description, including weight, dimensions L × W × H, protrusions, and sensitive surfaces |
| Loaded case weight | Full device plus accessories plus charger/cables if always carried |
| Targeted users | Field technicians, lab staff, service engineers, retail refund/replacement workflows |
| Foam preference | PU, PE, or XLPE; density range if known; or request supplier recommendation based on loaded weight |
| Divider system | Removable, sewn-in, hook-and-loop, foam-cut, or hybrid; provide accessory list and desired zone map |
| Shell and structure | Soft, semi-rigid, or rigid; handle type, shoulder strap yes/no, zipper route requirements, lid orientation |
| Logo and branding | Private label position, method, color, and any compliance/artwork deadline |
| Quantity band | Buyer-defined estimated order quantity; affects tooling and foam-cutting feasibility |
| Target market | Country or region; may affect material, labeling, packaging, and compliance expectations |
| Packaging and carton | Individual polybag, retail box, storage carton, barcode, carton marks, replacement packing logic |
| Sample deadline | Buyer-defined date or project phase for pre-production sample |
| Bulk delivery deadline | Buyer-defined date or window; supplier to confirm against material and tooling lead times |
| Inspection requirement | Buyer-defined acceptance checks, ISO/AQL alignment if applicable, loaded fit photo and pull test evidence |
| Compliance documents | Confirm which documents are required for the target market, if any |
Do not put a price target in the RFQ until you've already defined the structural requirements. A price target without a foam spec invites the supplier to quote the cheapest material that might not survive a single field season. If you have a hard budget, put it in a separate commercial envelope or share it after the technical spec is locked. This is not about hiding information; it is about making sure the technical person at the factory sees the requirement before the salesperson sees the target.
Common Mistakes That Turn Instrument Carrying Cases Into Warranty Problems
The following mistakes repeat across first-time industrial buyers and experienced purchasing teams alike. They all have the same root cause: treating the case as an accessory instead of a protection system.
- Specifying foam density from a color or "soft/medium/firm" category without knowing the loaded weight. A soft foam may feel premium and still bottom out under a heavy device.
- Asking only for outer dimensions and forgetting protrusions, battery packs, and cable clearance. A case that fits the nominal body may not close over the protruding connector.
- Letting the supplier decide divider placement without a zone map. The sewing operator will make a functional-looking bag that doesn't protect the actual kit.
- Approving a sample empty because it looks neat. An empty case tells you almost nothing about fit and movement.
- Skipping the loaded handle pull test. A handle that lifts an empty bag can tear under a full instrument set.
- Ignoring zipper route drag. Forcing the device past the zipper can cause scratches, dents, and accelerated zipper wear.
- Confusing water-resistant with waterproof or drop-resistant with drop-proof. Without an IP-style test or defined drop standard, those words are marketing, not engineering.
- Ordering bulk before freezing a golden sample. Small foam density or divider changes during production become invisible until units arrive.
These mistakes usually convert into landed cost later, even if the unit price looks lower now. A replacement shipment, a returned device, or a reputational hit in a technical market costs more than another sampling round.
FAQ About Instrument Carrying Cases
These are the questions most buyers ask after the technical discussion. If yours isn't here, ask the supplier these same questions in writing before any payment.
How is foam density measured?
Foam density is mass per unit volume, normally expressed as pounds per cubic foot (PCF) or kilograms per cubic meter (kg/m³). For production control, a supplier should be able to state the density grade of the actual foam block used, not just describe it as "high-density." Density is related to but not the same as firmness. The buyer should confirm the specific foam grade, compression set, and any indentation force deflection data if the foam is PU, because two foams with the same apparent density can behave differently under load.
Can PU and PE foam be mixed in one instrument carrying case?
Yes, and in many instrument cases the best design is mixed. A PE cavity gives structural support to the main body, while PU contact pads protect screens, lenses, or painted surfaces. The trade-off is assembly complexity: two foam types require more cutting steps, alignment, and possibly adhesive or fabric lamination. The buyer should confirm with the manufacturer how the two materials are bonded or positioned so they do not separate or shift in use. Mixed foam does not mean random layering; every layer should have a defined purpose and position.
What is the MOQ for custom foam inserts?
Custom foam insert MOQ is supplier-confirmed and depends on tooling, foam block yield, and whether the cavity is cut by die, water jet, or hand. A low MOQ may be feasible on a selected stock model when the supplier accepts setup charges and manual cutting, but the buyer should not assume any factory can produce one-piece custom foam inserts profitably. Ask the divider case manufacturer to separate the case MOQ from the foam tooling and setup cost so you can see what is driving the minimum order.
How should a buyer test an instrument case handle?
Use a buyer-defined pull test with the case loaded to the maximum expected field weight. The simplest acceptable evidence is a video or photo of a straight vertical lift with the specified load. For stronger claims, let the buyer define a hold time or repeated lift count, and ask the supplier to document the stitch or anchor condition after the test. The pass criterion is not "it lifted"; it is "no visible seam pop, tear, or permanent anchor stretch after the defined load." This is a pass-fail field test, not an automatic industry standard.
What should a buyer check before approving an instrument case sample?
Before approving, check loaded fit with the real device, accessory zone clearance, zipper corner movement, handle attachment, foam edge finish, divider stability, and packing method. Loaded fit photos from top, side, and lid-closed views are the minimum record. If the device cannot be inserted straight without forcing, a heavy accessory touches a screen, or the zipper drags the device, the sample is not approved. Keep the evidence and freeze a golden sample before bulk.
Supplier Evaluation Questions to Confirm in Writing
Before you finalize a supplier, send this short block and ask for written confirmation. It forces the conversation out of "we can do it" into process territory.
- Which foam grades are available and who controls raw material repeatability?
- What is the cutting method for foam cavities, and how does the factory prevent density variation between lots?
- Will the pre-production sample use the exact production shell, foam, dividers, zipper, and handle anchors, or is it a similar reference?
- What is the documented procedure for handle pull testing and zipper movement testing?
- How are logo printing/packaging/carton specifications tied to your PO so bulk matches the approved sample?
- If a material is out of stock during production, what is the written substitution approval process?
- What records will be supplied with the bulk shipment: inspection report, loaded fit reference, carton marks, and final quantity?
This section is deliberately short because the detailed verification belongs in the pre-production sample. The goal here is to filter suppliers before you spend sample fees and time.
Conclusion
An instrument carrying case is not a style decision. It is a risk control document made of foam, fabric, zipper, and stitches. The buyer who loses money is not the one who pays a little extra for PE foam; it's the one who skipped the loaded sample test and approved a case that only worked empty. Specify foam density from loaded weight and fragility, draw the divider map before the exterior, force the supplier to show handle and zipper reinforcement, and never order bulk until the loaded sample matches the real equipment. If you do those four things, the mass production problems become manageable instead of inevitable.
For custom protective carrying cases, a qualified supplier should apply the same sequence because the technical customer notices movement, friction, and closure force—not just the outer fabric. Send the RFQ fields above with your actual instrument dimensions and accessory list, and the response should be a technical conversation instead of a commodity quote.
Get A Quote

Get A Quote
0 Comments