
Electrician Tool Backpack Guide: Load Rating, Pocket Layout & Reinforcement
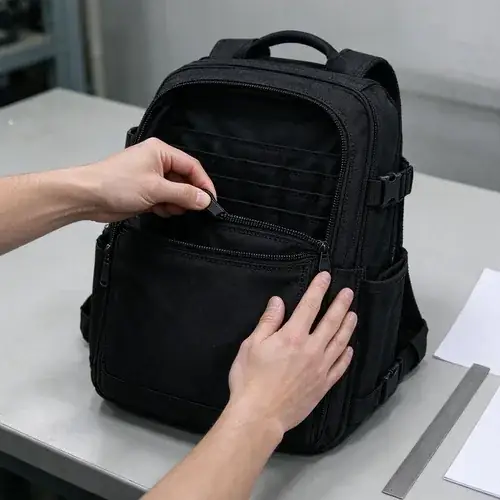
An electrician tool backpack is not a laptop pack with more pockets. It is a load-bearing field-service carry system, and the first sourcing decision is not pocket count, logo method, or shell fabric — it is defining the loaded-weight target, the actual tool list, the bottom structure, and the reinforcement points that will survive that weight every working day. Send an RFQ without those four inputs and you will discover the gaps during sampling instead of on the spec sheet: straps that pull out, loops that hold the wrong handle size, a base that sags under steel and copper.
That discovery method is expensive. A first-sample redesign adds a cycle you did not budget, but the larger cost is warranty and review risk when bulk units land with a field crew and failures show up months later. This guide is written for private-label brands, marketplace sellers, distributor product managers, and electrical contractor procurement teams evaluating a tool backpack manufacturer for OEM, semi-custom, or stock-model decoration programs.
Use this page in two passes. First, build the engineering envelope: tool list, weight class, pocket zoning, and base construction. Second, take the RFQ checklist and QC protocol into supplier shortlisting and pre-production sample approval. The goal is to source from a defined structure rather than a marketplace photo.
Quick Answer: What to Lock Before Sourcing an Electrician Tool Backpack
The short version: lock the tool list before the load rating, and lock the load rating before the fabric. Most sourcing mistakes happen in the other direction.
Four decisions should be settled before you spend time on quotes.
| Decision | Why it matters | What to confirm with the supplier |
|---|---|---|
| Target user and work pattern | Determines backpack format, access style, and carrier requirements | Who uses it, where, how many hours, ladder and confined-space frequency |
| Loaded-weight target | Drives webbing width, strap anchors, board thickness, and base choice | Whether the supplier has built similar loaded-weight industrial backpacks |
| Tool list and pocket matrix | Controls sleeve diameter, depth, retention type, and panel count | Sample pockets against the buyer's actual tools, not supplier defaults |
| Bottom and reinforcement structure | Controls tooling, cost, stability, and the most common failure zones | PE/PP board vs molded base feasibility, tooling limit, and sample timing |
If a supplier answers only with denier fabric and pocket counts, they have not heard the engineering brief yet. Push back until the quote addresses load and reinforcement.
Scope of This Guide
This page covers the structural and procurement decisions that separate a field-grade electrician tool backpack from a consumer daypack with organizer pockets. It goes deep on load planning, pocket zoning, fabric and base selection, reinforcement engineering, QC validation, and RFQ structure for B2B programs.
It does not cover generic EDC packs, fashion backpacks, tool reviews, or a "top 10" product list. It also won't tell you that any single material or molded base makes a pack "military-grade" or "weatherproof." Those words mean little in a sourcing conversation unless there is a test method, a measurable acceptance limit, and a documented failure threshold attached.
What Makes an Electrician Tool Backpack Different From a Standard Backpack?
An electrician tool backpack is different at the structural level, not just at the pocket level. A standard daypack is built around soft, distributed loads — a laptop, a jacket, a few small objects — where weight stays close to the back panel and rarely exceeds a low daily carry weight. An electrician's load is dense, metallic, uneven, and often dirty: screwdrivers, pliers, cutters, a multimeter, crimpers, fish tape, fasteners, and sometimes a power driver. That load concentrates force into a few narrow points: strap anchors, top handle, bottom seams, and the corner edges that touch concrete and ladder rungs.
So the question is not whether a pack has enough pockets. It is whether the pattern, seam placement, and stiffening are mapped to those forces. A bag that looks organized in a white-background photo can still fail at the first hard-bottom drop onto a jobsite floor.
| Carry format | Best use | Access pattern | Main structural risk | Typical buyer outcome |
|---|---|---|---|---|
| Electrician tool backpack | Long walks, ladders, stairwells, jobsites requiring hands-free carry | Vertical rows and pockets accessed while wearing or with the pack dropped open | Shoulder strap anchor failure, bottom sag, corner wear | High mobility if built to a defined load target |
| Open-top tool bag | Bench work, floor storage, truck access, oversized tools | Open top, fast grab, visible handles | Handle and base wear, spill from an overloaded top | Fast access, less comfortable over distance |
| Technician backpack | Mixed load with electronics, tablet, small parts | Compartmentalized, slightly longer access time | Similar strap and zipper strain, less tool-specific retention | Good for hybrid service, less ideal for dense steel hand tools |
| Rolling tool bag | Very heavy or oversized tool sets, short transport distances | Lay-flat or wheeled, accessed at floor level | Wheel, telescoping handle, and base failure | Reduces carry strain, adds pack size and price |
Electricians and HVAC or telecom technicians often carry very different tool mixes, so do not assume the same backpack silhouette works for both trades. If you are comparing formats for a field-service program, the same logic runs through the technician backpack vs tool bag comparison.
Typical Tool Categories That Drive Backpack Structure
The easiest way to design a wrong sample is to ask for "room enough for tools" without listing them. Each category below forces different pocket depth, retention, and padding.
- Hand tools with long handles — screwdrivers, nut drivers, pliers, wrenches. These need deep vertical sleeves and enough handle visibility so the user can grab the right one without pulling everything out.
- Test and measurement — digital multimeter, voltage tester, clamp meter, toner and probe sets. These need isolated padded zones, not loose steel pockets.
- Cutting and stripping — crimpers, wire strippers, cable cutters, knockouts. Heavy, pointed, and frequently used; retention must survive repeated one-handed reinsertion.
- Drilling and fastening — power driver, impact driver, bits, drill index, fasteners. These add sudden top-heavy weight if placed high in the pack.
- Consumables and small parts — electrical tape, wire nuts, terminals, zip ties, screws, wagos. Small and numerous; visible pockets prevent loss, but they must not sit in the deepest cavity.
- Cable and network — patch cords, fish tape, measuring tape, utility knife, gloves. Bulky loops and flat items need separate zones from sharp-edged tools.
Each category is a pattern decision: depth, width, whether the pocket is a loop, an elastic band, a zippered pouch, or a molded tray. A tool backpack manufacturer that asks for a real tool mockup, a weight table, or handle dimensions is doing you a favor. That is often the first sign they have built field-service packs before.
Backpack vs Open-Top Tool Bag for Field Service Teams
Backpack carry wins when people walk, climb, or ride between service points. It keeps hands free, distributes weight over two shoulders, and protects a workload from direct weather and dirt. Open-top bags win when speed of access and maximum capacity matter more than comfort — short hops from a truck, bench work, or oversized loose tools.
The decision is not about which format is better. It is about travel distance, load weight, and the order tools must be accessed. Heavy loads carried long distances need a backpack format with a strong harness; heavy loads carried a few meters need a good base and handle. Many corporate safety programs choose backpacks for exactly this reason, then find that the tool list expands and the original load target was too low.
How Should Buyers Define Load Rating Targets?
Load rating is a buyer-defined engineering target, not a marketing number. A supplier cannot honestly quote "indestructible" or "holds everything." You define the total loaded weight the pack must carry through a working day, and the supplier engineers webbing, seams, backing, and bottom support to that number.
A total loaded-weight target around 50–100 lb is sometimes used as an illustrative planning envelope for a full residential or light commercial service kit, but it is not an industry standard or a supplier promise. That range is only a discussion benchmark. The usable design load must come from weighing the actual tool set because a drill, long fish tape, or extra batteries change the center of gravity more than a pocket count does.
For a contractor backpack design, the first number is therefore not the pocket count. It is the weight of the kit when the end user fills the pack, because the harness and bottom must carry that weight every day. Whether the construction must change depends on tool density, center of gravity, carry duration, and the reinforcement strategy already in the pattern. Every quote you receive should name those changes, not just the denier.
Why Tool List Matters More Than Advertised Load Numbers
A "100 lb load rating" printed in a listing means nothing unless a test method defines it. It could mean the straps held 100 lb for a short static pull on a hook. It could mean a marketing team copied a competitor. It does not tell you whether the pack survives 100 lb after repeated zipper cycles, a few drops, and one technician yanking it up by a single shoulder strap every day.
Build the tool list first. Lay the tools on a scale. Record the weights by group. Then decide the target total weight with a safety margin for the random extras every field tech adds: spare batteries, a second meter, a water bottle, rolled cable, hardware. Most scopes underestimate that add-on weight, which is why the first production run feels flimsy even when the paper spec looked fine.
As a planning example only, a residential electrical service program might have a baseline tool kit that already weighs more than expected before batteries and cable. Actual electrician kits vary substantially by trade scope, tool mix, and add-on gear. The buyer should weigh the real tool set, nominate a design load above it with a working margin, specify a proof-load test at the upper end of that load window, and ask the supplier to show the same unit holding and carrying that weight. Now the number maps to a real use case instead of a web listing.
Reinforcement Changes Required for Heavier Loads
As the target load rises, the design does not get "a little stronger." It changes at specific points.
- Shoulder strap anchors add webbing length and bartack density rather than just wider straps; load path matters more than strap width.
- Top grab handle needs box-x stitching or bartacks spread over a wider seam allowance because users lift the whole weight with one hand.
- Bottom panel adds a PE or PP board, and above a heavier threshold the base may need a molded shape or raised perimeter edge.
- Load-bearing seams move from single needle to double needle or reinforced binding, with seam allowance confirmed, not assumed.
- Zipper on the main compartment moves from a light coil to a heavier supplier-specified coil gauge or molded zipper that can tolerate dirty-glove use.
For the strap-load side of this, there is a deeper treatment in the shoulder strap load engineering guide. The procurement point here is simple: when the supplier says "we will reinforce the straps," ask them to show where and how on the pattern, not just in words.
Pocket Layout Engineering for Electricians
Pocket layout should be treated as a workflow tool, not a screenshot of whichever competitor page ranks first. The goal is for a technician to grab the right tool in one motion, with the pack opened on a tailgate or the floor, without digging through loose cavities. Every pocket adds pattern time, fabric, labor, and failure points, so pocket count is a cost decision, not a marketing feature.
A useful exercise before the RFQ is to draw the tool set in the stages of a normal job: open the panel, remove the meter and tester, select drivers, cut and strip, then close up. Design the pocket order to match that sequence. Put the most-used tools where the hand touches them first.
| Tool zone | Typical contents | Suggested retention | Depth and access logic | Main risk to control |
|---|---|---|---|---|
| Vertical front rows | Screwdrivers, pliers, nut drivers | Elastic loops or fabric sleeves sized to handle diameter | Deep enough to keep the handle visible and easy to withdraw | Wrong loop diameter means the driver falls out or will not slide |
| Meter compartment | Multimeter, voltage tester, clamp meter | Padded isolated pocket, flap or wide-access zipper | Fast top or front access without unpacking steel tools | Hard tools crushing the display when the pack is dropped |
| Cable and flat zone | Fish tape, tape measure, cable sections, small rolls | Flat sleeve or wide compartment with webbing retainer | Short access path, clear of sharp tool tips | Fish tape head catching on fabric and tearing the panel |
| Small-parts module | Wire nuts, terminals, wagos, screws, tape | Zip or clear TPU pouch, tray loop, or molded box | Visible and quick-open, rarely deep in the pack | Small parts lost in the bottom lining after rough handling |
| Power tool zone | Power driver, impact driver, charger, spare battery | Reinforced pocket, block or board support, retention strap | Low placement to keep the center of gravity low | Top-heavy imbalance swinging the pack away from the body |
High-visibility lining in the tool area is not a cosmetic choice. It makes the opening read as "contents here" in a dark jobsite, and it forces the tool pockets to read as individual slots instead of one black void. If you are choosing fabric for the interior, ask for a light-colored liner swatch in the tool area, not just black fabric.
Vertical Tool Rows vs Open Compartments
Vertical rows make each handle visible and pre-sorted, so the user's hand goes straight to the tool. The trade-off is cost and flexibility: the sleeve diameter must fit the actual tool set, and a different client's tool mix can require pattern changes. Open compartments are cheaper, lighter, and more forgiving for odd-shaped tools, but small tools disappear at the bottom and the user wastes time digging.
For private-label electrician tool backpack programs, the best commercial balance is usually a hybrid: vertical rows for the core daily hand tools, a padded meter zone, and one or two open compartments for irregular extras. That gives the visible organization buyers expect while keeping pattern changes manageable.
Protecting Meters, Testers, and Sensitive Electronics
Multimeters, voltage testers, and clamp meters should never share a loose pocket with screwdrivers and pliers. A drop transfers impact through steel handles directly into the meter display or control dial. The compartment needs padded walls, a retention strap or snug sleeve, and enough separation from the dense tool zone to prevent contact pressure when the pack is zipped full.
Moisture resistance matters more than claims of waterproofing. A light rain or wet floor can damage electronics through a seam or zipper. Specify a moisture-resistant lining and ask the supplier how the compartment seam is finished, but do not call the pack waterproof unless the supplier has a documented test and taping specification for the exact seams.
Small Parts Storage and Consumable Management
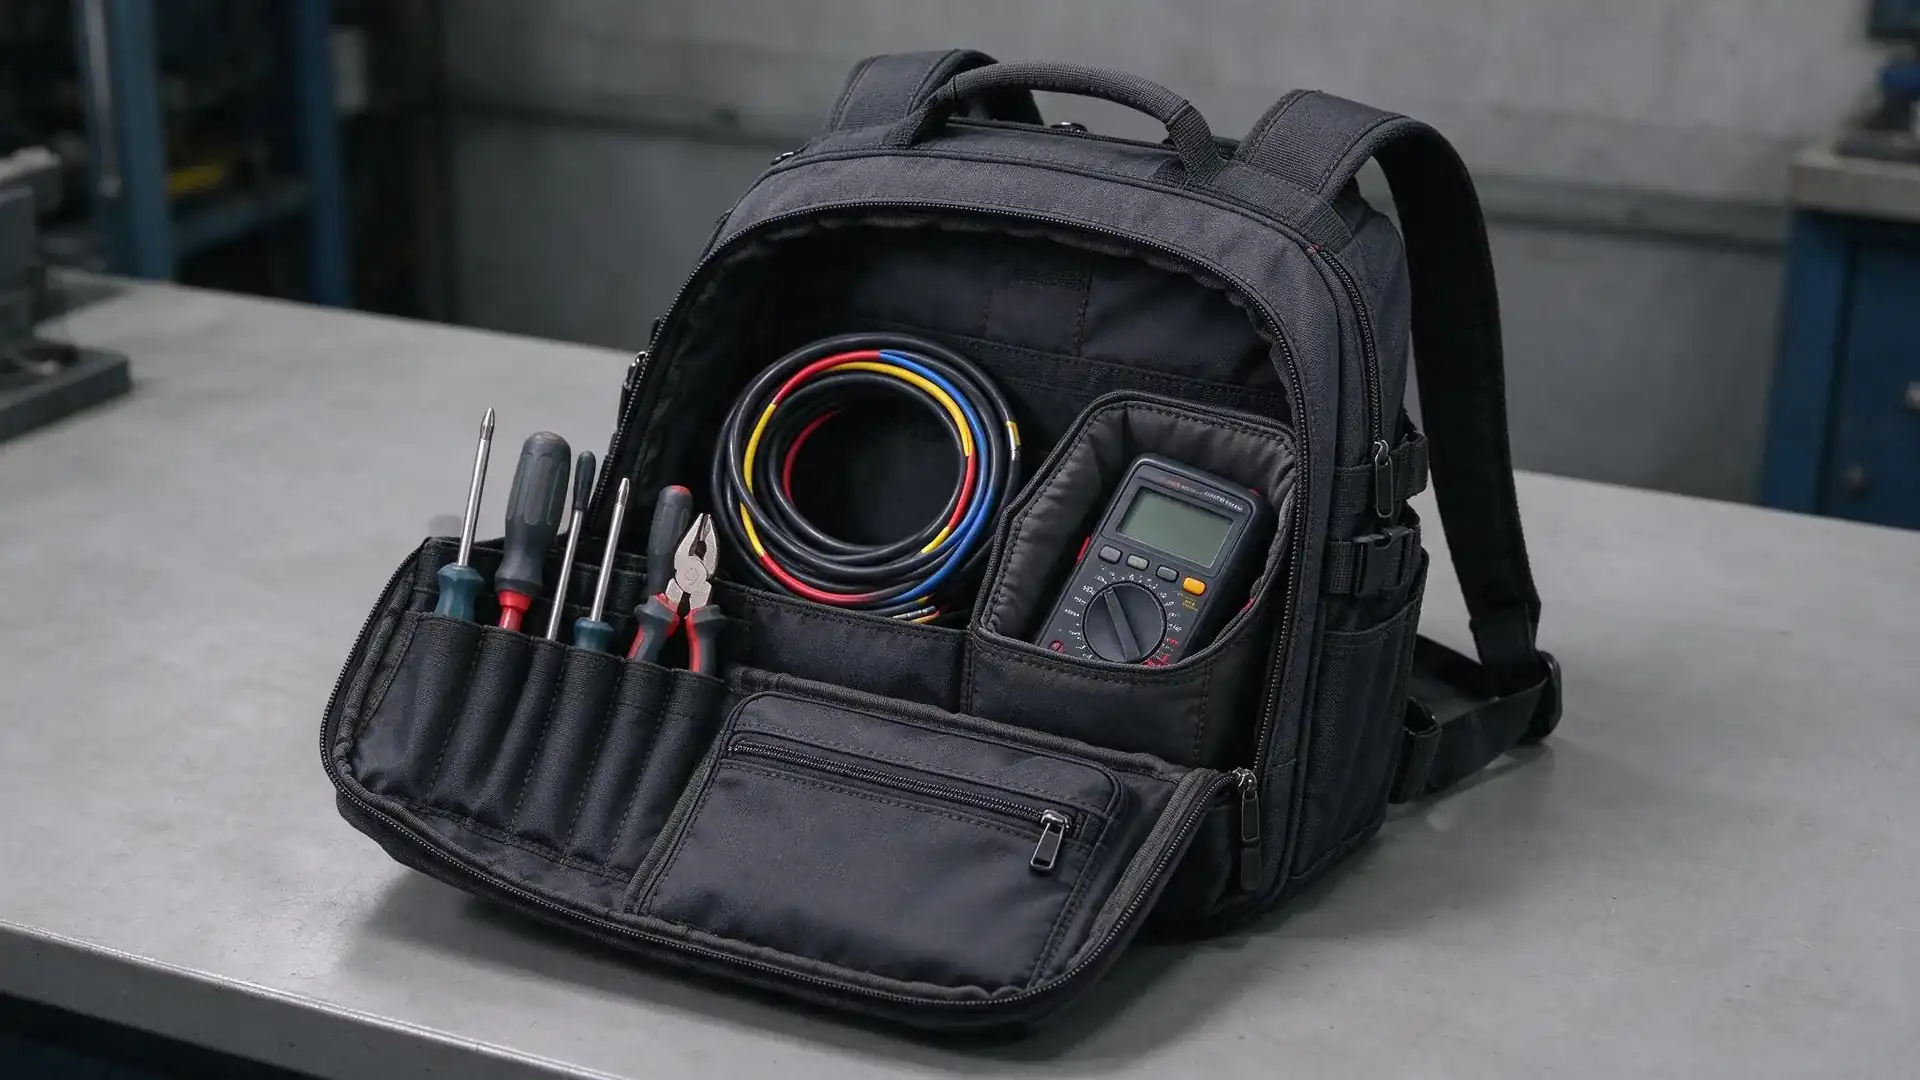
Wire nuts, terminals, screws, bits, and tape get lost when they sit in deep open cavities. The best solutions are clear or high-visibility zippered pockets, elastic retainers, or molded inserts that hold parts in a fixed position. A common mistake is scattering small-parts pockets across the bag, which makes the user hunt for them. Group the consumables zone in one place where the user opens it once and works out of it — like a tray on the front panel.
Material and Bottom Structure Selection
Material selection is not just about the denier number. It is denier plus yarn type, coating, panel setup, and where the material is placed. A high-denier shell in the center panel does not protect the corner that scrapes concrete every day. An abrasion panel in the wrong place is wasted cost.
For field-service packs, think in two layers: the base shell and the local reinforcement. The shell gives shape, tear resistance, and appearance. The local reinforcement gives survival — corner patches, bottom overlays, strap and handle panels.
A reinforced tool bag is often presented as stronger simply because it uses a heavier fabric. In practice the durability comes from the load path and seam placement, not from a single denier number.
| Structure option | Typical use in a tool backpack | Main advantage | Main trade-off | Confirm with supplier |
|---|---|---|---|---|
| 1680D nylon shell | Heavy-duty field service and industrial carry | High abrasion and tear resistance, traditional tough feel | Higher cost and weight; moisture take-up depends on coating | Yarn, coating, backing, and panel placement |
| 1680D polyester shell | Durable pack with better color and UV stability | Strong enough for many tool loads, more colorfast outside | Slightly lower abrasion than nylon of the same denier in many cases | Denier source, weave, coating, and handle feel |
| TPU/PVC corner or panel overlay | High-wear corners, bottom edges, kick zones | Concentrated abrasion resistance at failure points | Adds cost and stiffness, can fail at the edge seam if poorly bonded | Bonding or sewing method, thickness, and edge finish |
| Molded rubber or EVA base | Heavy loads, hard floor contact, standing stability | Shapes the bottom, protects fabric, sheds abrasion, supports weight | Tooling, minimum quantity, weight, and sample timing | Tooling feasibility, MOQ, hardness, wall thickness |
| PE/PP board bottom | Moderate to heavy loads needing cleaner structure | Lower tooling cost, flat shape, good support for a retail look | Less edge protection than molded, can crack or shear if too thin | Board thickness, edge finish, and how it is sealed into the base |
1680D Nylon vs 1680D Polyester
Both fabrics are workhorse options, but the choice is not interchangeable. When construction, weave, coating, and backing are comparable, nylon may offer higher tensile and abrasion resistance for the same denier, so it is often specified for heavy steel-tool carry. Polyester may win on color retention and UV stability for crews who work outdoors, and it can handle moisture differently. Neither is automatically "better" — the specification matters in the coating, the backing, and the panel layout. Ask for the actual material swatch and have the supplier state the denier, weave, coating type, and whether a lower-cost backing was substituted. If the quote says only "1680D," you have not received a material specification yet.
Molded Rubber Base vs PE/PP Board Bottom
This decision separates two completely different production programs. A PE or PP board bottom is simpler: the board is cut and inserted into a bottom pocket or between lining layers, giving the bag shape and a bit of load support. It samples faster and usually has lower up-front cost. The risk is that the board can crack under heavy impact, shift inside the base, or scrape through the fabric at the corners if the edge is not wrapped or sealed.
A molded rubber or EVA base is more of a commitment: it can need tooling, a supplier-confirmed minimum quantity, longer sample time, and more weight. In return it gives a shaped standing foot, edge protection, and better abrasion resistance when the bag is dragged across floors or dropped onto concrete. The practical guidance is to choose the board bottom for moderate loads and cleaner retail or shelf programs, and consider the molded base when the pack is positioned as heavy duty, floor contact is constant, or the marketing claim depends on standing stability. Always ask about tooling cost, sample timing, and whether the mold can be reused for later size changes before committing.
Common Failure Zones Around Corners and Bottom Seams
Corners fail before the main panel because they receive both abrasion and seam tension at the same time. The pack is set down on the bottom corners, dragged slightly, and kicked under a truck or bench. The corner coating wears off, the yarn frays, and then the seam at the base junction takes the load. Add a wet floor and the bottom seam starts absorbing moisture into the pack.
A hard bottom tool backpack is not automatically tougher than a soft one; it has a different failure mode: the board or mold edge can become the first point to crack or abrade the fabric if the seam is not finished correctly.
The fix is deliberate corner design: a TPU or PVC patch, a double-layer panel, a wrapped edge, or a molded base that extends up the corner. Do not accept stitch-only reinforcement for a heavy tool bag corner. Ask the supplier to show the corner construction on the pre-production sample and explain why it survives repeated floor contact.
Reinforcement Engineering and Stress Points
Electrician tool backpacks fail at the load points, not at the large fabric panels. The panel may look new when the strap tears out. Reinforcement should be mapped to the places where force enters and exits the bag: shoulder strap anchors, top grab handle, side handles, bottom seams, corner edges, and the inner organizing panel that carries the tool rows.
What makes a reinforcement real is not the word "reinforced" in the description. It is the quantity and placement of material layers plus the stitching and seam finish. A single additional fabric patch without proper stitching can still peel away.
Shoulder Harness and Webbing Reinforcement
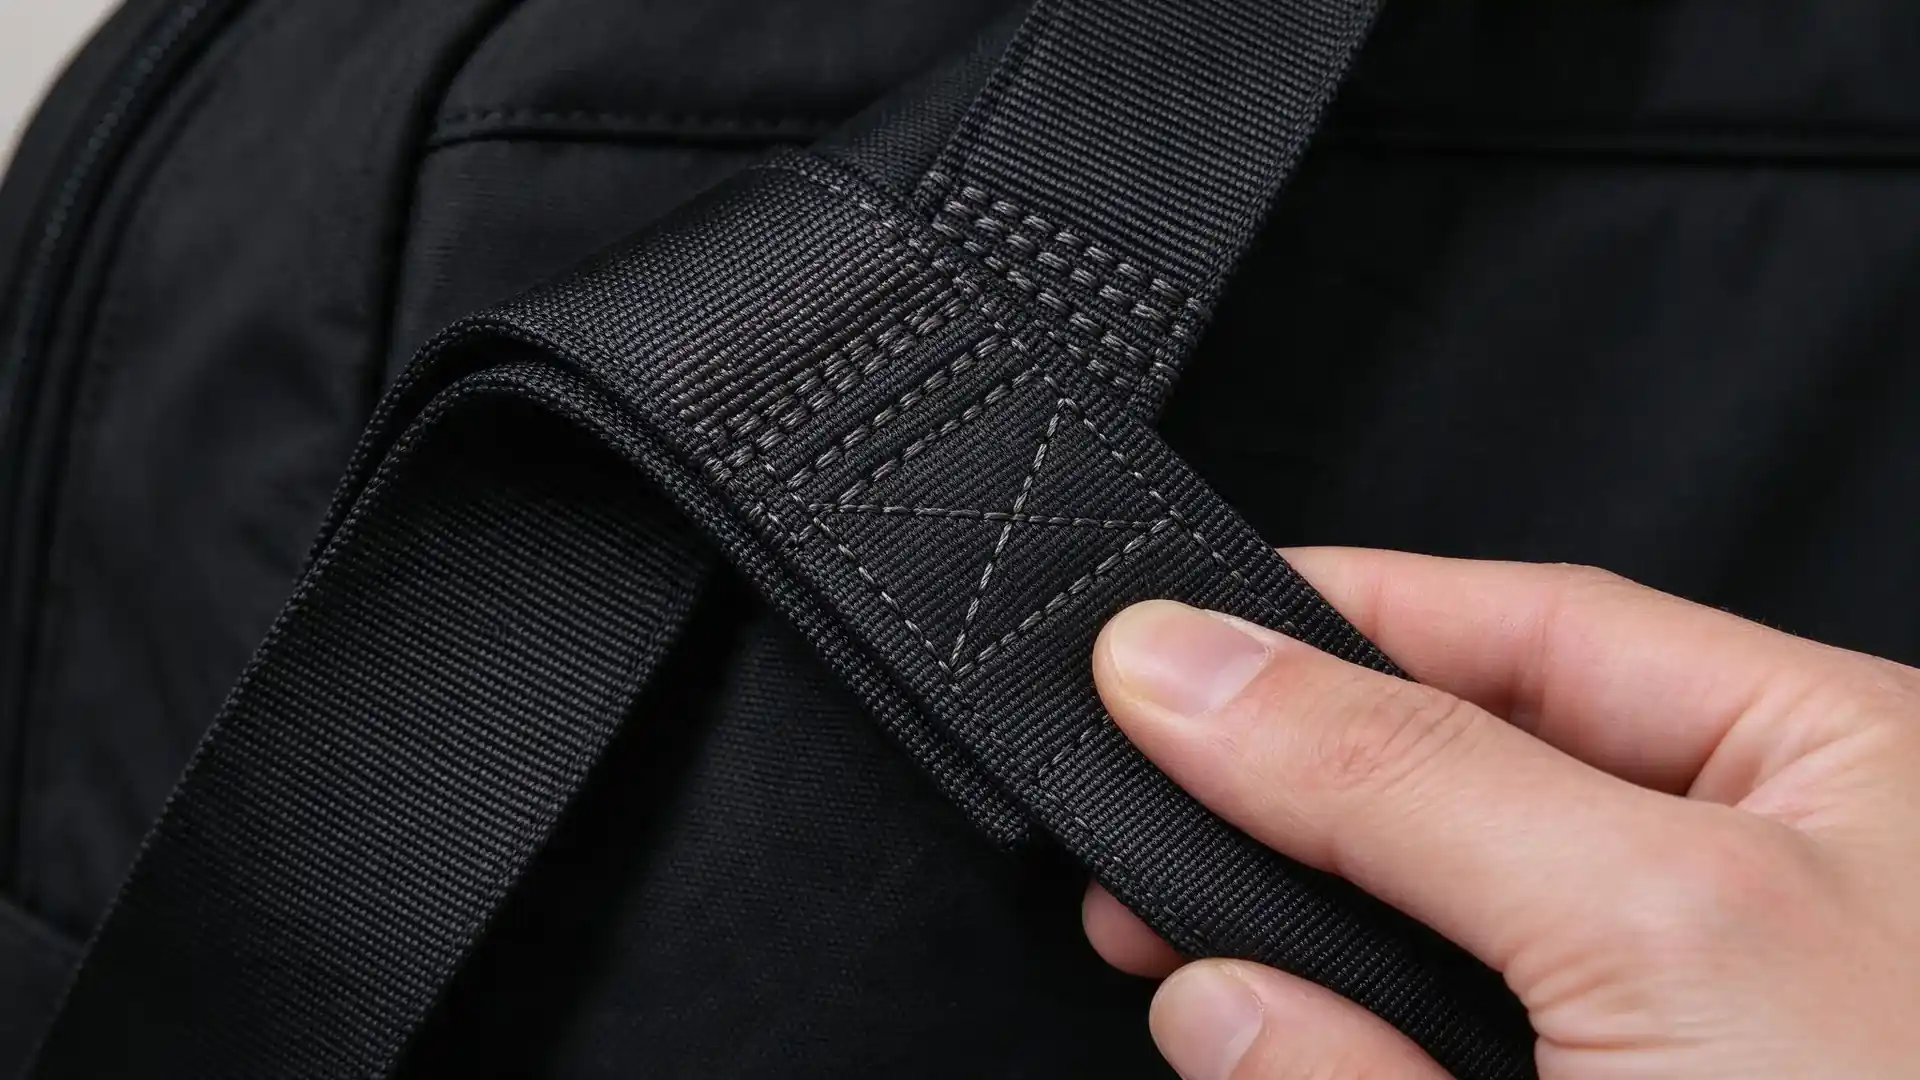
The shoulder harness is a load path, not a style element. The webbing anchor must be captured far enough into the bag or behind a back-panel seam so that pull is spread across several inches rather than a single seam line. The straps should be secured with bartacks or box-x stitching at the body connection, and the top handle should receive the same treatment because it carries the whole bag during short lifts.
On heavy loads, foam padding density and EVA back-panel support affect comfort after an hour of carry, but the more frequent commercial failure is mechanical: the webbing pulls out of the seam, or the anchor seam fails because a supplier saved fabric by shortening the anchor length. Inspect this on the first sample. Hold the loaded bag by one strap and watch the seam movement.
Stitching Methods Used in Heavy Tool Bags
The two stitching patterns that matter most are the bartack and the box-x. A bartack is a dense, short zigzag reinforcement used at strap ends, zipper stops, and pocket edges. A box-x is a rectangular stitch with an X through it, used on handles, webbing anchors, and other pull points. Both spread load across a seam instead of letting one continuous stitch line tear.
Thread choice matters too. Bonded polyester or nylon thread performs differently in abrasion and UV. Stitch density, specified in stitches per length, changes seam strength and cost. Accept the sample only after the supplier confirms which thread, stitch density, and patterns were used, and then verify those same settings appear on the bulk production order. The sourcing detail makes the difference; the marketing word does not.
Why Corners Often Fail Before Main Panels
Corner failure starts with a simple physical sequence: the corner touches the ground first, takes the abrasion load, and carries the seam stress of the bottom and side panels meeting. The coating wears off, the fabric weakens, and then the seam opens or the yarn frays. A wet or gritty floor accelerates the process because dirt acts as an abrasive and moisture weakens the coating.
That is why corner reinforcement belongs in the bill of materials from the first RFQ, not as a later fix. A corner patch, a wrapped edge, or a molded base that extends around the bottom corners changes the economics of the pack but prevents the most visible and expensive failure mode in field return photos. The full reinforcement methods for heavy-duty backpacks page goes deeper into how these construction choices interact.
QC Testing and Pre-Production Validation
Approving a sample is not the same as testing a structure. A sample tells you the pattern looks right; a validation protocol tells you it can hold the load. Write your acceptance method before the pre-production sample so the supplier knows exactly what evidence to provide.
| QC checkpoint | What to inspect | Common failure | Evidence to request |
|---|---|---|---|
| Static load | Pack filled to target weight, suspended by straps or handle for a defined time | Strap anchor movement, seam opening, handle deformation | Loaded-test video or inspection photo set with the setup visible |
| Dynamic carry | Loaded pack carried or cycled in a short walking or jostling sequence | Seam cracking, board shift, zipper strain | Video or report describing the movement and load |
| Zipper cycling | Main and priority pockets zipped full for a defined number of cycles | Slider binding, coil separation, fabric caught in zipper | Cycle count and visual report of the zipper before and after |
| Pocket retention | Loops and sleeves repeatedly loaded and unloaded | Elastic stretching out, loop tearing, loose tools | Before and after photos and insertion-removal count |
| Stitching and seam allowance | Specified seam allowance, stitch density, bartack placement | Missing bartacks, narrow allowances, skipped stitches | Cut-and-check report or close-up photos on the pre-production sample |
The exact test numbers should be buyer-defined and supplier-confirmed. There is no single universal standard for "tool backpack load test," so any supplier quoting one without seeing your load target is answering a different question.
Loaded Stress Testing for Backpack Structures
For load-bearing structures, test the pack the way it will fail. Fill it to the defined target weight, suspend it by the shoulder straps, and hold it for a set time while observing the anchors. Then cycle it through a short dynamic load: carry, lift, set down, lift by top handle. The point is not to destroy the sample; it is to find the first sign of movement or seam opening before bulk production locks in the pattern.
Ask for the test setup to be visible in the evidence so you can confirm the pack was actually loaded, not tested empty. A buyer can require that the weight is listed, the suspension point is shown, and the observation time is noted. If the supplier will not show the setup, do not treat the claim as validated.
Pocket Retention and Tool Drop Testing
Pocket failures are slower than strap failures, but they create daily frustration and reviewer complaints. The two checks that catch most problems are retention cycling and a defined drop test. For retention, load and unload each sleeve or loop repeatedly and check whether the elastic relaxes or the fabric ballooned. For drop resistance, drop the loaded pack from a modest height onto a hard surface a few times on different faces, then inspect the meter compartment and the pocket stitching.
These tests are intentionally low-velocity and repeatable, but they are not guaranteed non-destructive; a weak structure may show seam movement, pocket damage, or fabric stress during the sequence. They mimic the drop onto concrete or tile that service crews routinely inflict without inventing exotic laboratory language.
Bulk Production Consistency Checks
The real risk is the gap between the pre-production sample and the bulk run. A supplier can ship a well-made sample and then substitute a lighter backing, thinner board, narrower seam allowance, or different elastic in production. The protection is a written inspection plan that covers the critical-to-function points: material identity, board thickness, stitch density, bartack confirmation, zipper gauge, and strap anchor construction.
AQL 2.5 for major defects is sometimes used as a starting reference in bag inspection, but it is not a universal product standard. The applicable AQL level, sampling plan, and defect classification must be confirmed by the buyer, brand, or inspection provider for this product. For example, the buyer might classify a missing bartack at a strap anchor, a separated zipper slider, or a cracked board as a major or critical field failure, while a minor thread run may be reworkable. Write that distinction into the acceptance criteria before production so the inspection label and the product risk are aligned.
RFQ Checklist for Electrician Tool Backpack Sourcing
A weak RFQ produces a weak quote and a worse sample. The point of the RFQ is not to ask for a discount — it is to make the supplier commit to a structure. When the supplier responds with changes, you learn whether they understood the field-service requirement or just pasted a standard backpack quote.
| RFQ field | What to specify | Why it matters in tool backpack sourcing |
|---|---|---|
| Bag type | Electrician tool backpack with wide-mouth main opening, vertical tool rows, padded meter zone | Confirms format and access style before pricing |
| Target user | Electrical contractor, residential service tech, MRO, distribution | Sets pocket design and durability assumption |
| Loaded-weight target | Buyer-defined total weight range and working safety margin | Drives webbing, anchors, board, and base selection |
| Tool list | Actual tools grouped by category, approximate weights, handle dimensions | Determines pocket depth, sleeve diameter, retention |
| Shell fabric | Denier, yarn type, coating, color, and abrasion panel placement | Prevents a quote that says only "1680D" |
| Bottom structure | PE/PP board, molded rubber or EVA base, or reinforced soft bottom | Controls tooling, cost, stability, and sampling time |
| Reinforcement | Bartack and box-x zones, webbing anchor length, corner patches | Defines the highest-risk construction points |
| Zipper | Heavy main zipper gauge or supplier-specified molded model, with cycling expectation | Prevents slider and jam failures in dirty field use |
| Inner lining | High-visibility tool area, padded meter zone, moisture-resistance need | Affects access, durability, and electronics protection |
| Logo and branding | Method, position, thread or panel color, artwork approval flow | Separates stock decoration from OEM work |
| Packaging | Individual polybag, carton strength, barcode and shipping requirement | Affects landed cost, handling, and marketplace prep |
| Inspection | AQL reference, critical defect list, pre-production sample approval, load-test evidence | Locks the quality standard before bulk production |
| Quantity and destination | Buyer-defined order volume and target market | Controls cost structure, logistics, and compliance questions |
Required Technical Inputs Before Sampling
Before a pre-production sample is cut, the supplier needs the following items on the table. These are not optional details; they are the difference between a sample that matches the pattern and a sample that matches the buyer's actual use.
- A written tool list grouped by category, with weights and key handle or probe dimensions.
- The total loaded-weight target and the safety margin to be tested.
- The opening direction and access sequence: top, front panel, left hand, right hand.
- The pocket matrix: which pockets are vertical rows, padded zones, flat sleeves, or zippered modules.
- The bottom construction: board, molded base, or soft reinforced, with buyer-defined board thickness or base style.
- The reinforcement spec: bartack and box-x placement, strap anchors, top and side handles, corner overlays.
- The fabric and lining requirement, with denier, coating, and color.
- The zipper and hardware requirement: gauge or model, supplier-specified vendor if available, finish, and cycling target.
- Logo and branding method, position, and artwork approval.
- Packaging: individual bag, carton, barcode, and shipping mark.
- Inspection standard: AQL reference, critical defect list, evidence to be provided.
OEM vs Semi-Custom Stock Model Decisions
A stock backpack can sometimes be upgraded into a reinforced electrician tool backpack if the base construction and pocket pattern allow it. Selected stock models with accepted setup charges may support low-volume logo decoration and some internal additions. A full OEM tool backpack means the buyer controls the pattern, material, base tooling, and reinforcement map. That usually means higher up-front development and a supplier-confirmed minimum quantity.
The responsibility mapping matters more than the label. Who owns the pattern if the tool list changes? Who approves the pre-production sample? Who commits to repeat-order consistency? Who fixes a bulk failure if the reinforcement was not built as specified? A clear OEM or semi-custom decision answers those questions before the first purchase order.
For private-label programs, the broader private-label backpack sourcing process walks through the supplier coordination and approval flow. For heavy-duty work you still need the engineering envelope above; the private-label guide covers the marketing and packaging side of the same project.
Supplier Verification Questions Before You Share the Tech Pack
Before sending your full spec, check the supplier against the load-bearing work you are asking them to do.
- Ask for examples or construction photos of previous industrial tool backpacks, especially strap anchors, bottom structures, and corner reinforcement. A generic daypack portfolio does not prove field-service experience.
- Ask how they would load-test a pack at your target weight. A supplier who cannot describe a test setup cannot validate the structure.
- Ask whether they control the pattern internally or outsource it. Ownership affects revision speed and repeat-order consistency.
- Ask who approves the pre-production sample and whether the same team supervises bulk sewing. Sample quality means little if production supervision is disconnected.
- Ask how they document material substitution and seam allowance during bulk production. If they cannot produce a cut-and-check record, treat the quality claim as unverified.
Common Mistakes That Delay Electrician Tool Backpack Sourcing
The bottlenecks in electrician tool backpack programs usually repeat themselves. Each mistake below adds a sample cycle or creates a warranty risk that shows up after the first order lands.
- Starting with fabric before the tool list. You cannot choose panel fabric intelligently until you know weight, abrasion zones, and pocket stress. Do the tool layout first.
- Copying a load rating from a competitor listing. That number has no test method. Define your own load, margin, and proof test.
- Quoting before the pocket diameter is confirmed. Sample sleeves that do not fit screwdrivers and pliers produce a full pattern revision, not a small trim change.
- Skipping the pre-production sample. Your first samples are pattern and material samples. The pre-production sample is your production standard; skip it and you have no reference for the bulk inspection.
- Treating the bottom board as a cosmetic insert. The board carries weight and shape. Wrong thickness or a sharp unwrapped edge fails in the field.
- Ignoring zipper gauge. A light coil zipper on a stuffed heavy pack binds and splits at the worst time. Specify a sturdier main zipper and confirm cycling.
- Packing molded bases without edge protection. A molded base can press into the carton in transit. Confirm carton internal protection and drop-check handling.
- Forgetting the QC evidence. Asking "is it strong?" without asking for load-test evidence and photos leaves you relying on trust. Ask to see the setup.
FAQ: Electrician Tool Backpack Sourcing Questions
These answers cover the sourcing questions most buyers still have after the engineering review. Each answer assumes a buyer-defined specification; where a fact is supplier-dependent, it says so directly.
Can a stock backpack be upgraded into a reinforced electrician tool backpack?
Sometimes. A selected stock model may accept internal tool sleeves, added bartacks, a board insert, and logo decoration without full OEM development if the supplier accepts the setup charges and the pattern allows it. The limits are the base construction and the strap anchors: if the stock pack was not built for a heavier load, adding pockets and a board may not fix a weak anchor path. Ask the supplier to confirm the stock construction, the decoration MOQ, the setup cost, and whether the reinforced sample can be made before the bulk order. If the answer is "we will make it work" without showing the stress-point changes, treat the stock upgrade as riskier than a clean OEM pattern.
Is a molded base universally necessary for industrial use?
No. A molded base may be preferred for heavy floor contact, standing stability, and high-abrasion field work, but a correctly specified PE or PP board bottom can serve moderate-load electrician backpacks at lower tooling complexity. The decision depends on load target, floor conditions, and pack weight. If the load is moderate and the bag sits on shelves and truck floors more than concrete drags, a board bottom is often enough. If the marketing position is "heavy duty" and the bag will be kicked and dropped on jobsites, the molded or reinforced base may earn its cost. Confirm board thickness and edge finish for the board option, and confirm tooling, weight, and sample timing for the molded option.
What causes shoulder strap failures in bulk production?
The most common causes are anchor length reduction, missing or insufficient bartacks, seam allowance shrinkage, and a material substitution under the webbing. The strap may look the same in a photo, but the bulk unit tears at the connection because the load path was shortened or the stitching was skipped. Control it by approving a pre-production sample, writing bartack and box-x placement into the spec, sealing a reference sample, and asking for bulk inspection at the strap anchors. A seller or trader cannot offer that control unless the factory production record is auditable.
How should buyers evaluate zipper durability?
Specify the zipper by gauge or model and ask for evidence, not the word "heavy duty." A supplier-specified coil zipper or molded zipper with a heavier gauge handles dirty-glove use better than a fine coil, but the model confirmation matters more than the adjective. Define a cycling expectation for the main compartment, request before-and-after inspection evidence, and feel the slider on the sample before approval. If the pack can be overstuffed, the zipper should have enough tolerance in the panel design, not just a bigger slider.
What packaging details matter for marketplace or distributor shipments?
For electrician tool backpacks, packaging has two jobs: protect the product in transit and survive distribution handling before the buyer opens it. Specify individual bagging, carton strength sufficient for the loaded unit weight, internal protection for any molded base or board corners, and the barcode or shipping label requirement for the sales channel. Carton drop-check confirmation protects against the most common damage — flattened bases and crushed corners before the unit is ever opened. Packaging cost should be treated as landed-cost protection, not an afterthought.
Conclusion
A successful electrician tool backpack program is won before the first sample. Lock the tool list, set a buyer-defined loaded-weight target, map the pocket layout to real workflow, choose the base and reinforcement structure deliberately, and write the QC protocol into the RFQ. A competent tool backpack manufacturer will engage with the same specifics; a less experienced supplier will only talk denier and pocket count.
Your next action is to prepare the RFQ from the checklist above, request a pre-production sample with the specified reinforcement and stitch details, and require loaded-test evidence before bulk approval. Then hold the bulk run to that sample with a written critical-defect list. That discipline is what separates a private-label electrician tool backpack that earns repeat orders from one that generates warranty returns and field complaints.
Get A Quote

Get A Quote
0 Comments