
Custom Backpack Logo Methods Compared: Embroidery, Print, TPU & Metal
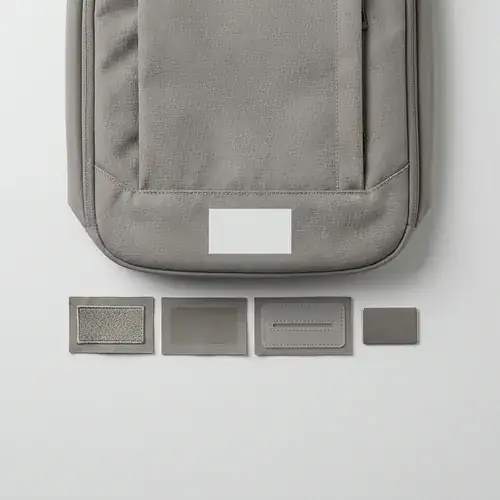
Custom backpack logo methods are the application processes—embroidery, screen printing, TPU patch, and metal badge—that put your brand mark on a backpack's fabric, webbing, or hard surface. The right method depends on three things before anything else: the base fabric, the order volume and setup budget, and the finish your end customer expects. A corporate laptop backpack and a promotional drawstring bag rarely belong in the same conversation.
Choose wrong, and the damage is real: embroidery can pucker thin waterproof nylon, screen print can crack or peel on coated fabric, a TPU mold fee can wreck the budget on a small test order, and a metal badge can look cheap if the attachment method wasn't thought through. None of those problems show up in the digital mockup. They show up at the pre-production sample, or worse, in a warehouse of finished goods.
That's why this guide breaks each method down by texture, Pantone matching limits, MOQ impact, setup cost drivers, and material compatibility. The goal is to help you write an RFQ where the supplier cannot guess your logo spec—and to approve a physical sample that matches what your customer will actually receive. For the broader approval workflow, start with our bulk custom backpacks with logo guide.
Quick Answer: How to Choose the Right Custom Backpack Logo Method
Before going deep, here's the short version for a buyer who needs to narrow the field fast.
| Logo Method | Best For (Use Case) | Texture/Finish | Setup Cost Driver | Pantone Matching |
|---|---|---|---|---|
| Embroidery | Corporate, school, team, promotional gifts | Raised thread, soft 3D texture | Digitizing file per logo version | Approximate via supplier thread chart |
| Screen Print | High-volume promotions, simple flat logos | Smooth, flat ink on surface | Screen frame per color | Solid PMS with matched ink |
| TPU Patch | Outdoor, tactical, sports, automotive-style branding | Molded rubber-like 3D patch | Custom mold per shape and layout | Physical swatch match; Pantone as target reference |
| Metal Badge | Business laptop bags, premium and luxury lines | Rigid metal, plated finish | Die or mold per badge shape | Plating and enamel; physical sample required |
Use embroidery when the logo is small to medium and the fabric can take needle penetration without distorting. Use screen printing when the order volume is high and the design is flat with a small number of solid colors. Use a TPU patch when the bag is outdoor or tactical and the customer wants a dimensional, weather-tolerant mark. Use a metal badge when the positioning is premium and the extra setup and attachment work is acceptable.
There is no universal "best" method. There is only the method that survives your fabric, volume, and brand positioning.
Scope of This Guide
This guide covers the four decoration methods buyers actually specify on custom backpacks: embroidery, screen printing, TPU patches, and metal badges. It does not cover every bag branding system—no woven labels, hangtags, zipper pullers, embossing or debossing as the main subject, sublimation, or heat transfer in depth. Some of those live in their own dedicated sourcing articles because the decision logic is different.
The advice here is written for B2B buyers—brand owners, online retailers, sourcing managers, and promotional distributors—who need to specify, quote, sample, and approve before bulk production. Exact prices, minimum order quantities, and production timelines vary by supplier, model, and destination, so they remain buyer-confirmed facts in your RFQ, never assumptions this guide will make for you.
Embroidery: Best for Corporate and School Backpacks
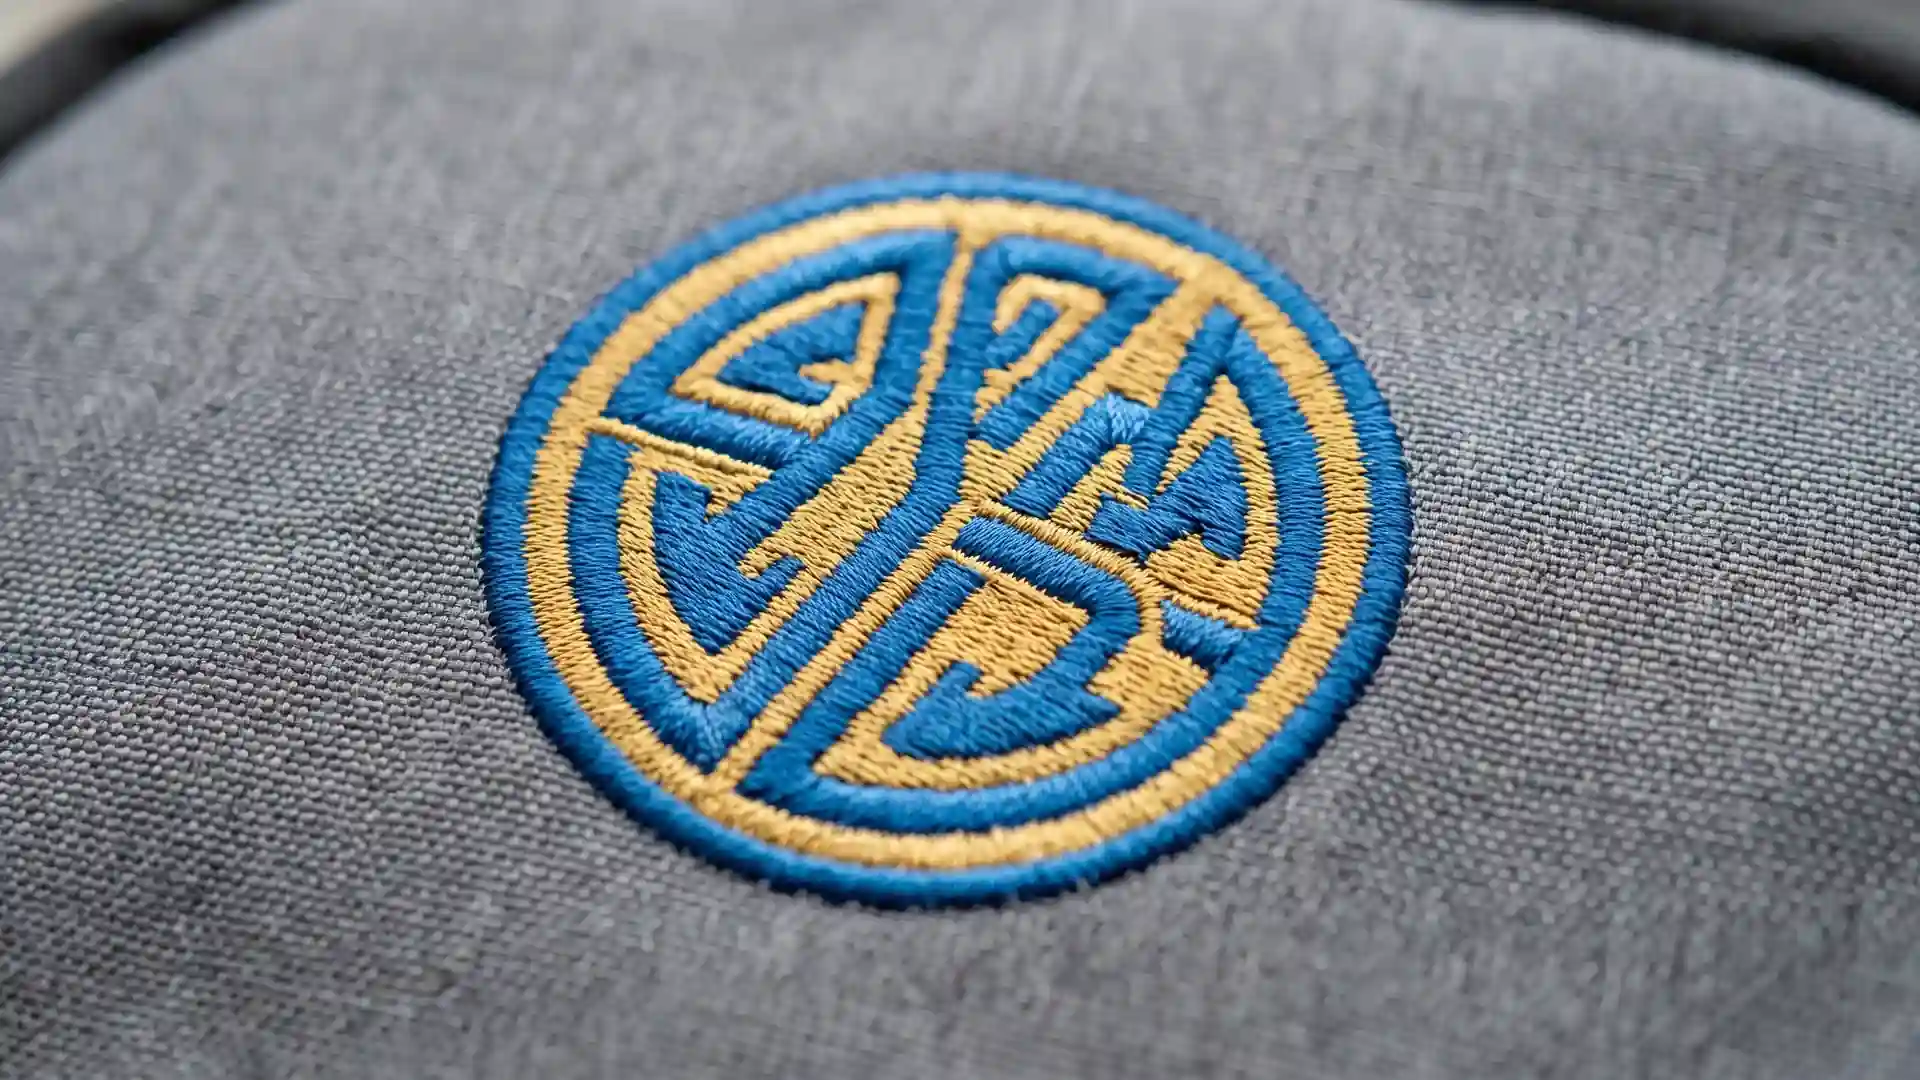
Embroidery is a branding method where a logo is stitched directly into the backpack fabric using thread, creating a textured, three-dimensional finish. Most bag suppliers call the conversion step "digitizing": your vector logo is translated into a stitch file that controls needle path, thread trims, and stitch density.
Why buyers choose it: perceived quality, no ink to crack, and a stitched mark that survives washing and daily abrasion far better than many print methods on soft fabrics. It fits corporate laptop bags, school backpacks, team bags, and promotional items where woven texture signals a more considered product.
What to check before approving embroidery:
- Digitizing is a one-time setup task, usually charged per logo version. If you change the logo color or small text, you may need a new or revised stitch file.
- Small lettering is the biggest failure point. Lettering below roughly 6 mm to 7 mm in height tends to close up into an unreadable blob with standard thread. Ask the digitizer for a minimum lettering recommendation before finalizing small text.
- Complex gradients, tight photographic detail, and extremely thin lines don't translate well into thread. Embroidery works on solid shapes, simple letters, and separated color blocks.
- The practical stitch area is usually linked to the supplier's embroidery hoop and the bag panel's flatness. Confirm the actual usable area on your chosen panel before locking the logo dimensions.
- Thin woven nylon and waterproof-coated fabric can pucker when dense stitching pulls the surface. A lower stitch density or an edge-sewn patch is sometimes safer.
The commercial upside is durability and perceived value. The risk is an unreadable logo or a distorted panel if the artwork wasn't digitized for the actual fabric. Approve a stitch-out, not just a computer screenshot.
Screen Printing: High-Volume Promotional and Flat Designs
Screen printing is the workhorse for high-volume, re-orderable promotional and private label backpacks. A screen is made per color in the design, and ink is pushed through the mesh onto the fabric. The unit cost usually drops as quantity rises because the screen frames are a one-time setup and the remaining work is repeatable ink application.
Where screen printing shines:
- Solid color matching. For many bag fabrics, a supplier can mix ink to a specified Pantone code. That's a real advantage when brand color is non-negotiable.
- Flat, simple logos with a small number of solid colors. Fewer colors means fewer screens and lower setup complexity.
- Large uninterrupted back panels or front pockets without straps, zippers, or seams crossing the print area.
Limits buyers often ignore:
- Coated waterproof fabrics and thick PU surfaces don't hold screen ink as reliably as woven polyester. Ask for an adhesion or abrasion check on the actual material.
- Very thin lines and small text can fill in or lose sharpness depending on mesh count. A proof on paper is not a proof on fabric.
- Screen ink on flexible zones that bend constantly—around top handles or over padded laptop sleeves—may crack with repeated use. Placement matters as much as method.
- Halftone or gradient work is possible, but it increases setup complexity and needs a supplier that actually controls dot gain and opacity.
Vector artwork in AI, EPS, or SVG is the standard starting file. If you're comparing screen print against sublimation, heat transfer, or digital techniques, the deeper discussion lives in our custom printed backpacks sourcing guide.
When does screen printing lose? When the logo is a premium multicolor gradient on coarse woven canvas, when the fabric surface is heavily coated, or when the order volume is small enough that the setup spread makes the per-unit cost unattractive. Confirm the screen count per color, the usable print area, and whether the supplier tests adhesion on your exact fabric.
TPU Patches: Modern, Durable Branding for Outdoor and Tactical Bags
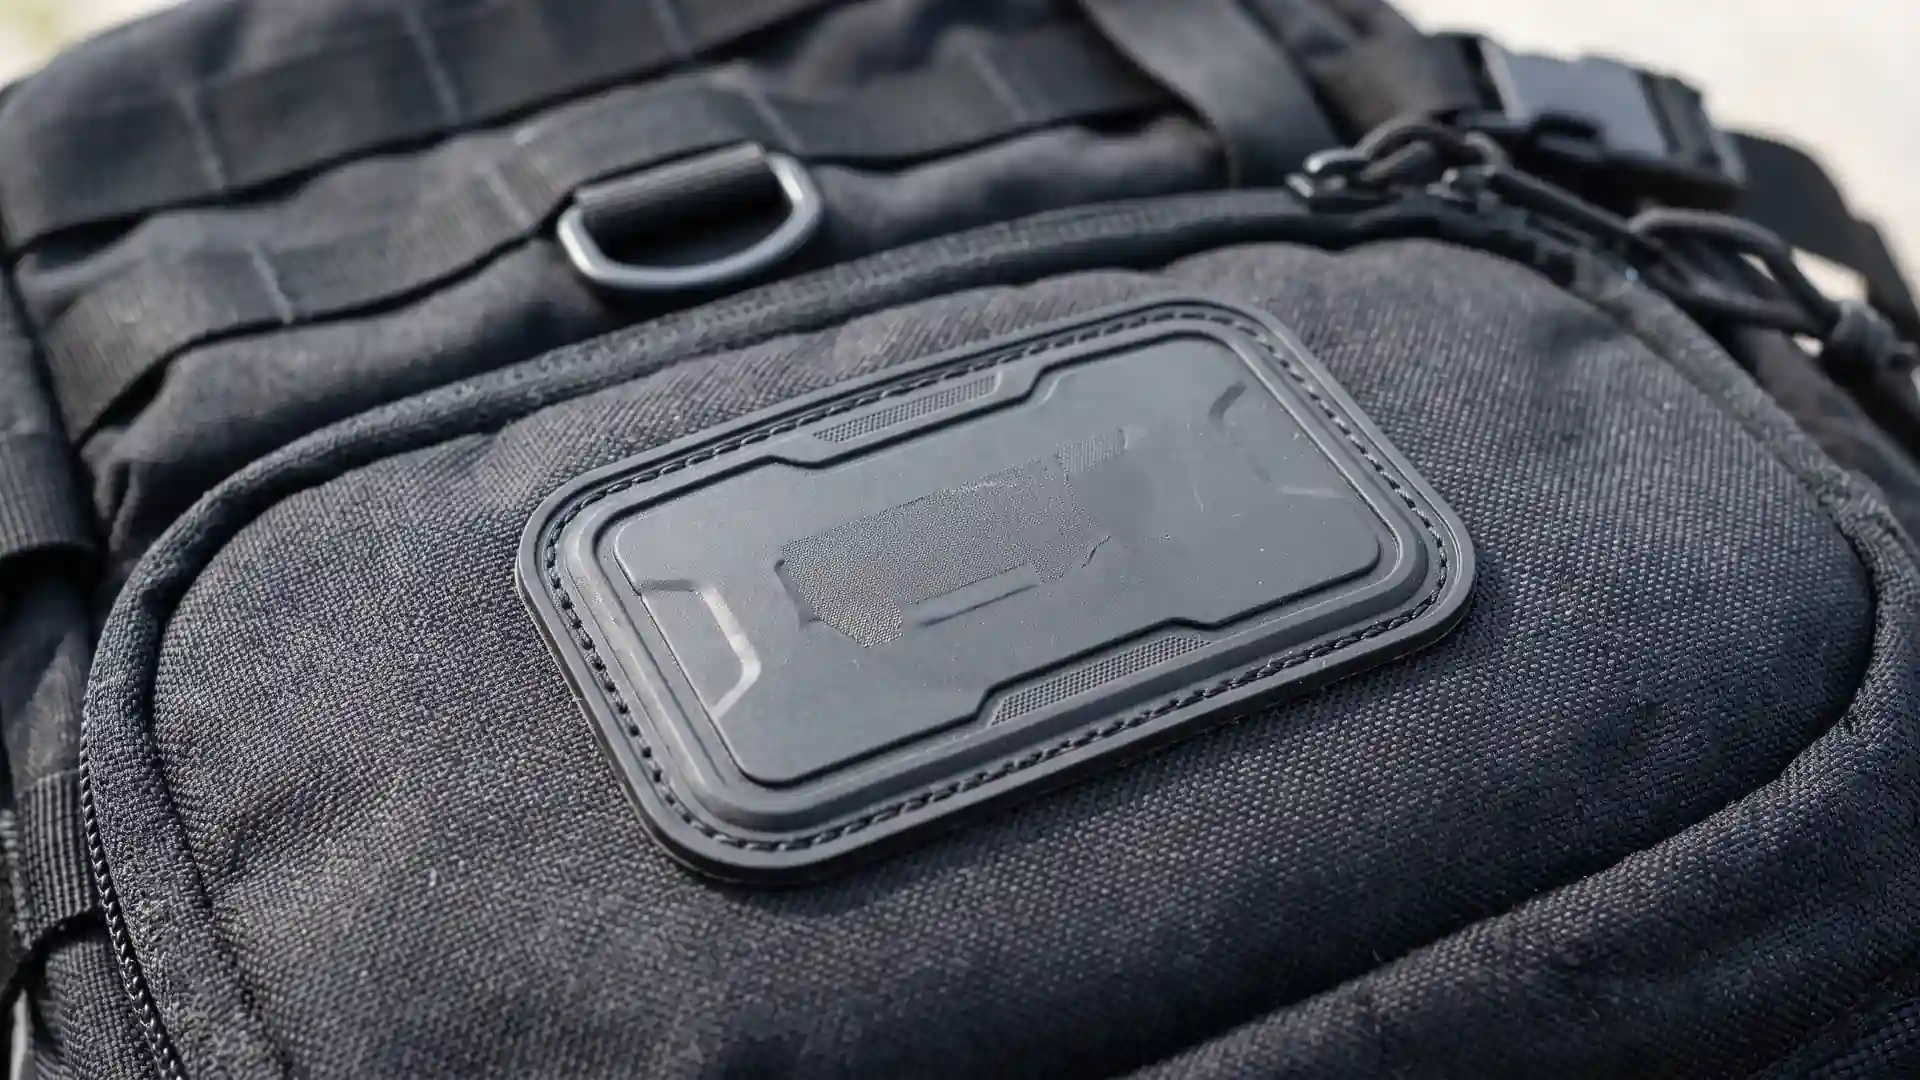
A TPU patch is a flexible, molded rubber-like label produced from thermoplastic polyurethane. It's then sewn, heat-welded, or sometimes adhesively bonded onto the bag. TPU patches give a dimensional, modern brand mark that tends to hold up better than surface ink in wet, muddy, or high-abrasion outdoor use.
Why buyers specify TPU:
- A raised, sculpted look that screen print can't produce.
- High perceived durability: no thread to snag compared with embroidery, and no ink layer to crack.
- Because the patch is produced separately, the same mold can maintain consistent logo quality across multiple bag sizes.
But TPU is not a low-commitment option:
- You're paying for a mold. The mold is usually per shape, size, and sometimes per color cavity. It's a one-time setup charge, but it can be substantial and it's quote-dependent. Do not commit to a custom TPU logo for a small test order without asking how long the mold is kept and whether the fee is amortized or charged separately.
- Pantone matching on TPU is not exact. Suppliers match to a physical color swatch; Pantone is used as a target reference, not a guaranteed print match. If the TPU is translucent or has a backing color, the final shade shifts.
- Attachment changes feel and durability. A stitched patch is tactile and structurally separate; a welded patch sits flatter and works better on waterproof surfaces but needs temperature and pressure control to avoid deforming the fabric.
- Thin TPU details below a certain height can fill during molding. Confirm the minimum raised detail height with the mold maker before approving the design.
TPU suits outdoor brands, tactical bags, sports teams, and EDC products. It's less appropriate for a corporate laptop bag where subtlety matters more than texture. For a different dimensional effect on PU or leather patch areas, some buyers compare TPU with debossed vs embossed bag logos.
Metal Badges: Premium Finish for Business and Luxury Backpacks
Metal badges are rigid decorative plates, often die-cast or stamped, with plated surface finishes and sometimes enamel-filled color. They signal a premium business or luxury positioning and are common on laptop backpacks, briefcase-style bags, and executive product lines.
What a metal badge actually requires:
- Tooling. A die or mold sized to the badge shape and thickness. Setup charges are quote-dependent and typically higher than a digitizing fee or a single screen frame. Ask what happens if the logo changes after tooling—the die may need replacement or modification.
- Attachment. Badges can be screwed with posts and a backing plate, riveted, sewn through perimeter holes, or adhesive-backed. The attachment choice is as important as the badge itself. A heavy badge on thin polyester can sag, tear, or deform the panel over time.
- Plating and color. Chrome, nickel, brass, gunmetal, and other finishes vary in durability and corrosion behavior. Enamel fill colors are matched with physical samples, not true Pantone ink.
- Safety on soft fabrics. The back side of the attachment must not scratch a laptop or irritate the wearer. Backing plates, washers, and smooth post caps need to be specified.
Metal badges read premium when the bag structure supports them. On an inexpensive promotional daypack, a metal badge often looks mismatched—and it adds attachment labor that cheap quotes don't cover properly. Reserve metal for models where the price point and fabric panel justify the hardware. Not every method suits every product. That's the entire point of a technical comparison.
Material Compatibility: Matching Logo Methods to Backpack Fabrics
This is where most real-world failures happen. Buyers commit to a method in a screenshot, then the sample arrives puckered, melted, peeled, or unreadable because the decoration method fought the fabric.
| Fabric Type | Recommended Logo Methods | Methods to Use with Caution or Avoid | What to Confirm with Supplier |
|---|---|---|---|
| Polyester (woven, standard) | Embroidery, screen print, TPU patch, metal badge | Dense embroidery can pucker lightweight polyester | Stitch density for the specific fabric weight |
| Thin Nylon (lightweight or ripstop) | Screen print, heat-applied TPU | Heavy embroidery may pull and distort; metal badge may weigh down the panel | Embroidery stitch density and backing choice |
| Waterproof-coated Nylon or Polyester | Heat-welded TPU, light screen print if coating allows | Embroidery and sewn patches create needle holes that may breach the coating | Water-resistance impact of each attachment method |
| PU Leather | Metal badge, debossed or embossed, sometimes sewn patch | Screen print adhesion and cracking risk | Adhesion and flexibility test on the PU surface |
| Canvas (cotton or cotton-blend) | Embroidery, screen print, sewn TPU patch | Metal badge may look heavy unless the bag is structured | Shrinkage and print absorption behavior |
The simple needle-penetration test resolves most of this. If the fabric is coated or laminated to be water-resistant, any stitched decoration—embroidery or a sewn patch—introduces holes. Some suppliers seal the thread or add a backing layer, but that's not the same as an unbroken coated surface. Confirm whether the bag is sold as water-resistant and whether the logo process voids that claim.
Heat-applied TPU on coated nylon avoids needle holes, but excess heat can melt low-denier fabric or disturb the coating. The factory controls temperature and dwell time; the buyer controls the material choice. Polyester tends to be the lowest-risk fabric for most methods, but "polyester" is not one material. A 600D woven panel behaves differently from a 210D lining panel. Specify the exact fabric code, not just the fiber.
Canvas works well with embroidery and screen printing, but prints can soak into the weave and lose opacity. Ask for an opacity check on the pre-production print. Don't decide the logo method before the base fabric. They're one specification.
Cost and MOQ Impact of Custom Backpack Logo Methods: Setup Fees vs. Unit Prices
B2B buyers constantly misread logo pricing because they compare only unit costs. Every custom backpack logo method has two separate charges: the one-time setup and the per-unit application.
Setup cost drivers:
- Embroidery: digitizing file, one per logo version and size, plus possible thread color matching for custom shades.
- Screen print: screen frames, one per color, plus possible screen storage for repeat orders.
- TPU patch: mold or laser-cut pattern; custom 3D shapes, fine detail, and multiple logo sizes all raise the tooling requirement.
- Metal badge: die or mold, plating finish, and possibly enamel color matching.
Per-unit cost drivers:
- Embroidery: stitch count and thread changes.
- Screen print: number of colors and print passes, plus labor per placement.
- TPU patch: patch material, attachment labor, and any backing adhesive.
- Metal badge: badge piece cost, attachment hardware, and assembly labor.
The economic breakpoint matters more than the unit quote. A setup-heavy method like a TPU mold or metal die behaves very differently from setup-light embroidery or screen printing at small quantities. If the supplier can use an existing stock patch or badge shape, setup charges may drop; if the shape is fully custom, the mold or die dominates. Ask for setup and unit cost as separate line items in every quotation. Do not accept a blended number.
MOQ logic follows the same pattern. Applying a simple logo to a stock bag model usually carries lower quantity barriers than opening a new mold or die. Some suppliers may allow low-volume embroidery or stock-patch decoration when setup charges are accepted and the buyer absorbs the setup cost. That's a supplier policy, not a universal industry promise. In the RFQ, ask directly: "What is your minimum run for each logo method on the selected stock model, and which setup charges are waived or amortized at larger volumes?"
This connects to total landed cost. A lower unit price with a high mold fee can still be economical across a large repeat-order program, but it's a poor trade on a one-time promotional buy. Think lifetime order volume, not first-order price.
Pre-Production Sample (PPS) and QC Checklist for Custom Backpack Logo Methods
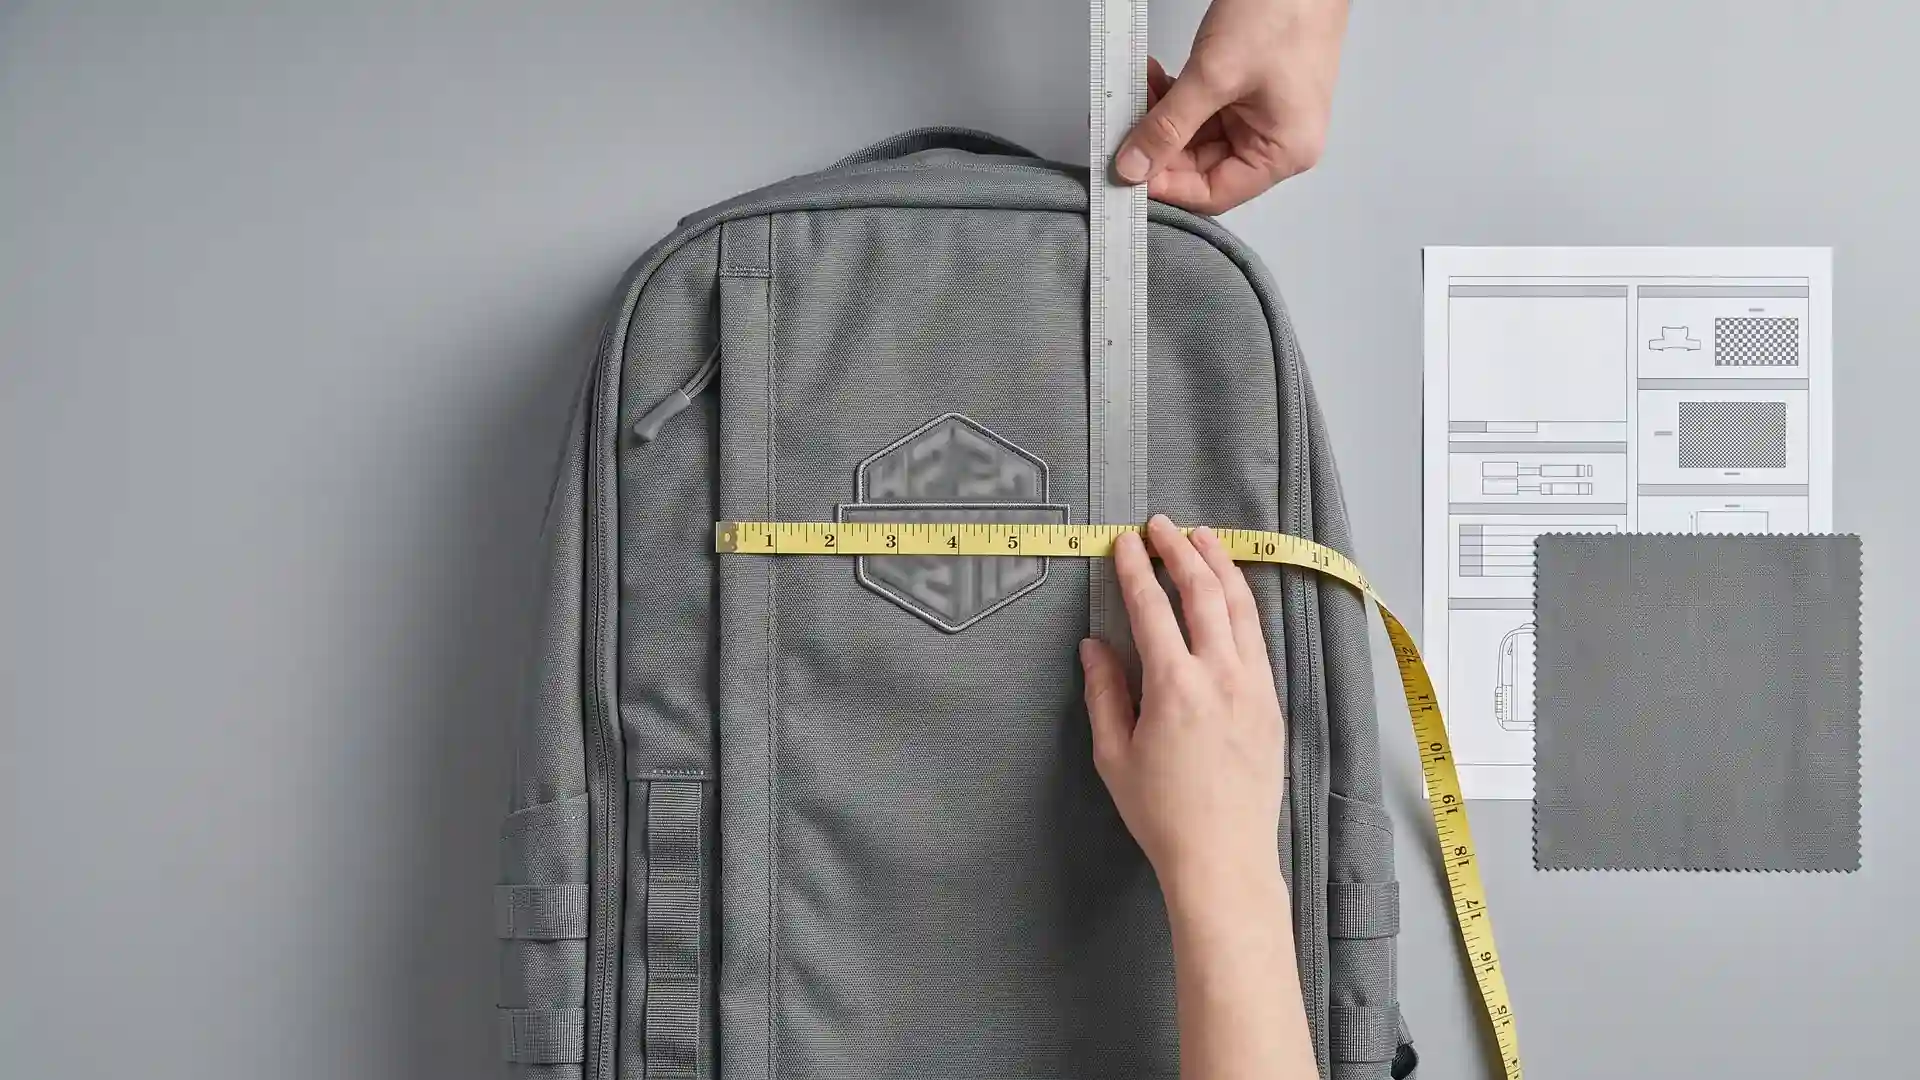
The pre-production sample is where a digital mockup becomes a physical proof. If your supplier sends a photo instead of a sample, push back. A logo that looks correct on screen can arrive with the wrong thread sheen, ink opacity, or badge plating.
What to approve on a logo sample:
- The method exactly as ordered, on the actual fabric and panel, not a substitute swatch.
- Finished logo dimensions in millimeters or inches, measured on the sample.
- Placement measured from a fixed structural reference, not "eyeballed."
- Color against the specified Pantone code or physical swatch under neutral lighting.
- Edge quality: no loose thread, cracked ink, lifted patch edge, or scratched metal face.
- Back side: no exposed rough badge posts, messy embroidery backing, or adhesive residue seeping through the fabric.
| Check Item | What to Provide or Verify | Why It Fails in Production |
|---|---|---|
| Artwork file | Vector AI, EPS, or SVG supplied; low-res raster flagged | Supplier re-draws a screenshot and changes proportions |
| Color | Solid Pantone PMS code or approved physical swatch | Buyer submits RGB or CMYK and disputes the final shade |
| Finished size | Exact width × height in millimeters or inches | Logo auto-scales too small or too large across bag sizes |
| Placement | Measured from a seam, zipper, or strap anchor | Logo ends up under a strap or crossing a seam |
| Physical approval | Stitch-out, print proof, or badge sample approved | Bulk runs from an unapproved paper proof |
This is where most suppliers earn or lose the account. The failures are rarely surprises—they're the same logo and branding customization mistakes that buyers skip during approval.
Supplier Verification: Questions to Ask Before Committing to a Logo Method
A factory that sews backpacks well is not automatically a decoration expert. Embroidery may be outsourced to a local stitching workshop; TPU molds may come from a separate mold maker; metal badges may be purchased as finished components from a third-party badge factory. That's not automatically bad—outsourced decoration is common—but it changes where your sample comes from and who controls repeatability.
Ask every shortlisted supplier:
- Which decoration processes are done in-house and which are outsourced? Who owns the mold file, screen frames, or digitized design?
- If the TPU patch or metal badge is purchased externally, can the supplier provide the component supplier's sample before attachment?
- What is the usable decoration area on the selected backpack panel, measured from seam, strap, and zipper boundaries?
- How will the logo stay consistent if the same mark is applied across multiple bag sizes in a range? One scaling rule cannot work blindly across a 15L and a 30L bag.
- What QC data does the supplier record for logo placement? A simple inspected count is weaker than a spec-based check with position tolerance.
- How will repeat orders match the approved first order? Who holds the physical sample, the stitch file, the mold, and the print screen between orders?
These questions cost nothing to ask and expose the supplier's control of the decoration process. If the answer is "we just put the logo where the picture shows," that's not a supplier ready to manage a brand line.
RFQ Checklist for Custom Backpack Logo Orders
Send this with the inquiry so the supplier must quote the same specification instead of guessing.
| Field | Your Input or Options |
|---|---|
| Bag type and model | e.g., 15.6-inch laptop backpack, stock model or OEM design |
| Primary logo method | Embroidery / Screen print / TPU patch / Metal badge |
| Secondary branding | Woven label / hangtag / zipper puller / none |
| Logo artwork | Vector file attached: AI / EPS / SVG / PDF |
| Logo color | Solid Pantone PMS code or physical swatch reference |
| Finished logo size | Exact width × height in millimeters or inches |
| Placement reference | e.g., centered on front panel, 50 mm below top seam |
| Panel and fabric code | Exact base fabric and coating, not just "polyester" |
| Quantity and market | Order quantity, target market, retail channel |
| Packaging and barcode | Polybag / carton mark / hangtag / barcode requirement |
| Sample required | Stitch-out / print proof / badge sample before bulk |
| Bulk delivery window | Buyer-defined delivery deadline |
| Inspection requirement | AQL or buyer-defined logo placement and color check |
| Setup charge split | Separate setup cost from per-unit application cost |
Send the artwork once as a vector file. If you only have a raster file, say so and ask for a re-draw quote or a clean vector conversion. The logo method is not the only thing that affects online retail success, but a poorly specified logo is an easy way to fail a listing review or generate customer complaints about "looks different from the photo."
FAQ on Custom Backpack Logo Methods
These are the technical questions buyers ask most often before approving artwork or placing a logo order. The answers assume standard B2B bag sourcing conditions; exact rules still need supplier confirmation.
What file format do suppliers need for backpack logos?
A vector file is the safest starting format: Adobe Illustrator (AI), Encapsulated PostScript (EPS), or Scalable Vector Graphics (SVG). High-resolution PDF exported from vector software also works. The reason is practical: suppliers can scale vector artwork to any finished logo size without losing edge sharpness, and they can extract solid color areas for screen separations, digitizing, or mold drawings. A low-resolution JPEG or PNG from a website screenshot forces the supplier to re-draw the logo, which changes details. If all you have is a raster file, state that clearly and ask whether a vector conversion is included or quoted separately.
Can I use RGB or CMYK colors for TPU patches or metal badges?
No. RGB and CMYK are screen and print color models. TPU, rubber, PVC, and metal plating are physical materials. For TPU, specify a Pantone code as the target and require a physical color chip or pre-production swatch to approve. For metal, the color comes from plating, anodizing, or enamel fill; reference the closest Pantone or physical sample, and approve an actual coated badge sample. The sooner you move from screen color to physical swatch, the fewer disputes you'll have at the pre-production sample stage.
How do I specify logo placement on a backpack?
Define placement as a measurable relationship to a fixed structural reference point, not a relative phrase like "centered on the front." Example: "Logo centered horizontally on the front panel; top edge of logo 50 mm below the front top seam; 20 mm minimum clearance from each side zipper." Add the finished logo width and height. That lets the factory measure the sample the same way you will. If the same logo appears on multiple bag sizes, specify a scaling rule per size or confirm a fixed logo size across all sizes before sampling.
Conclusion: Decide the Method with the Fabric, Not Before It
The custom backpack logo method is not a style preference you pick from a menu. It's a technical compatibility decision: fabric type, coating, decoration area, volume, setup budget, and end-user expectation all point to one method or pull you away from another.
The practical sequence: start with the base fabric and the bag's water-resistance claim, then shortlist methods that survive that fabric, then compare setup-versus-unit economics at your real order volume, then demand a physical pre-production sample on the actual fabric before approving bulk.
If the method and material match, the branding holds up. If they don't, the sample tells you in advance—provided you actually order one. That's the difference between a buyer who sources confidently and one who discovers the mistake inside a full container.
Get A Quote

Get A Quote
0 Comments