
Instrument Carrying Case Manufacturing: Foam Density, Divider Layout & Sample Testing
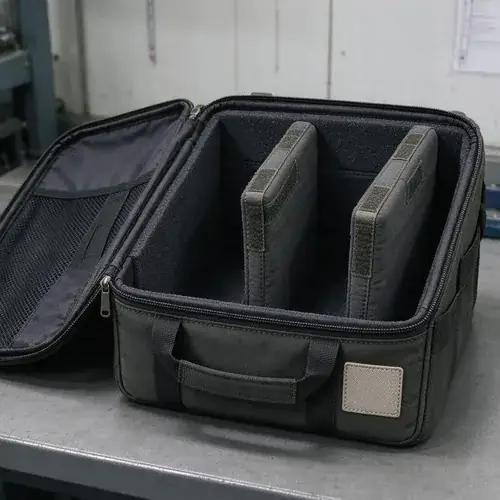
An instrument carrying case is only as safe as the dimensional and protection data behind it. Before you move a project to bulk production, you should specify the exact measured envelope of each instrument and its accessories, choose foam or divider architecture from loaded weight and surface sensitivity, then approve a loaded pre-production sample with fit photos, movement checks, and documented handle and zipper evaluation. The real sourcing risk is not the outer shell — it's the gap between assumed fit and how the equipment actually rides when a technician lifts, drives with, or ships it.
That gap costs you twice: first as field damage, warranty claims, and calibration or repair downtime; second as a bulk order that "looks like the sample" but protects poorly because nobody controlled foam substitution, divider movement, or zipper strain under load. This guide walks through the buyer-side decisions that prevent that: what to measure, how to specify foam firmness without overpromising, when to choose an insert over a divider system, which structural points to inspect, and what sample evidence to demand before production release.
Treat this as a pre-RFQ decision framework, not a foam chemistry lesson. If you send a supplier a category name, a rough outside dimension, and "protective foam," you'll get a quote. You may not get a case that holds up on the actual transport route. The next section gives the fast version.
Quick Answer: The Four Inputs That Decide Case Quality
Many instrument carrying case sourcing failures trace back to four under-specified inputs:
- Actual measured geometry — length, width, height including protrusions, connectors, screens, and control knobs.
- Loaded weight and accessory mix — the instrument plus every battery, probe, cable, charger, and adapter that will travel with it.
- Internal architecture — fixed foam cavities, hook-and-loop dividers, or a hybrid, chosen for movement control and field-service access.
- Approved loaded sample evidence — fit photos, lid clearance, shake or lift checks, zipper route, handle attachment, and packaging proof.
Get those four right and the rest of the sourcing process becomes easier to document. Get them wrong and you may approve a sample that is only cosmetically correct.
Scope of This Guide
This article is written for industrial equipment brands, electronics and calibration tool suppliers, field-service distributors, specialty-equipment importers, and product managers developing custom protective cases. It focuses on a custom instrument bag or equipment carrying case where movement control, access, and repeated handling matter more than flashy exteriors.
It does not cover consumer luggage selection, musical instrument retail advice, hard-shell mold engineering beyond sourcing relevance, or compliance law interpretation. I also won't give you a universal "best foam density" answer, because a number disconnected from your loaded weight and transport conditions is worse than useless — it creates false confidence.
What Buyers Must Define Before Developing an Instrument Carrying Case
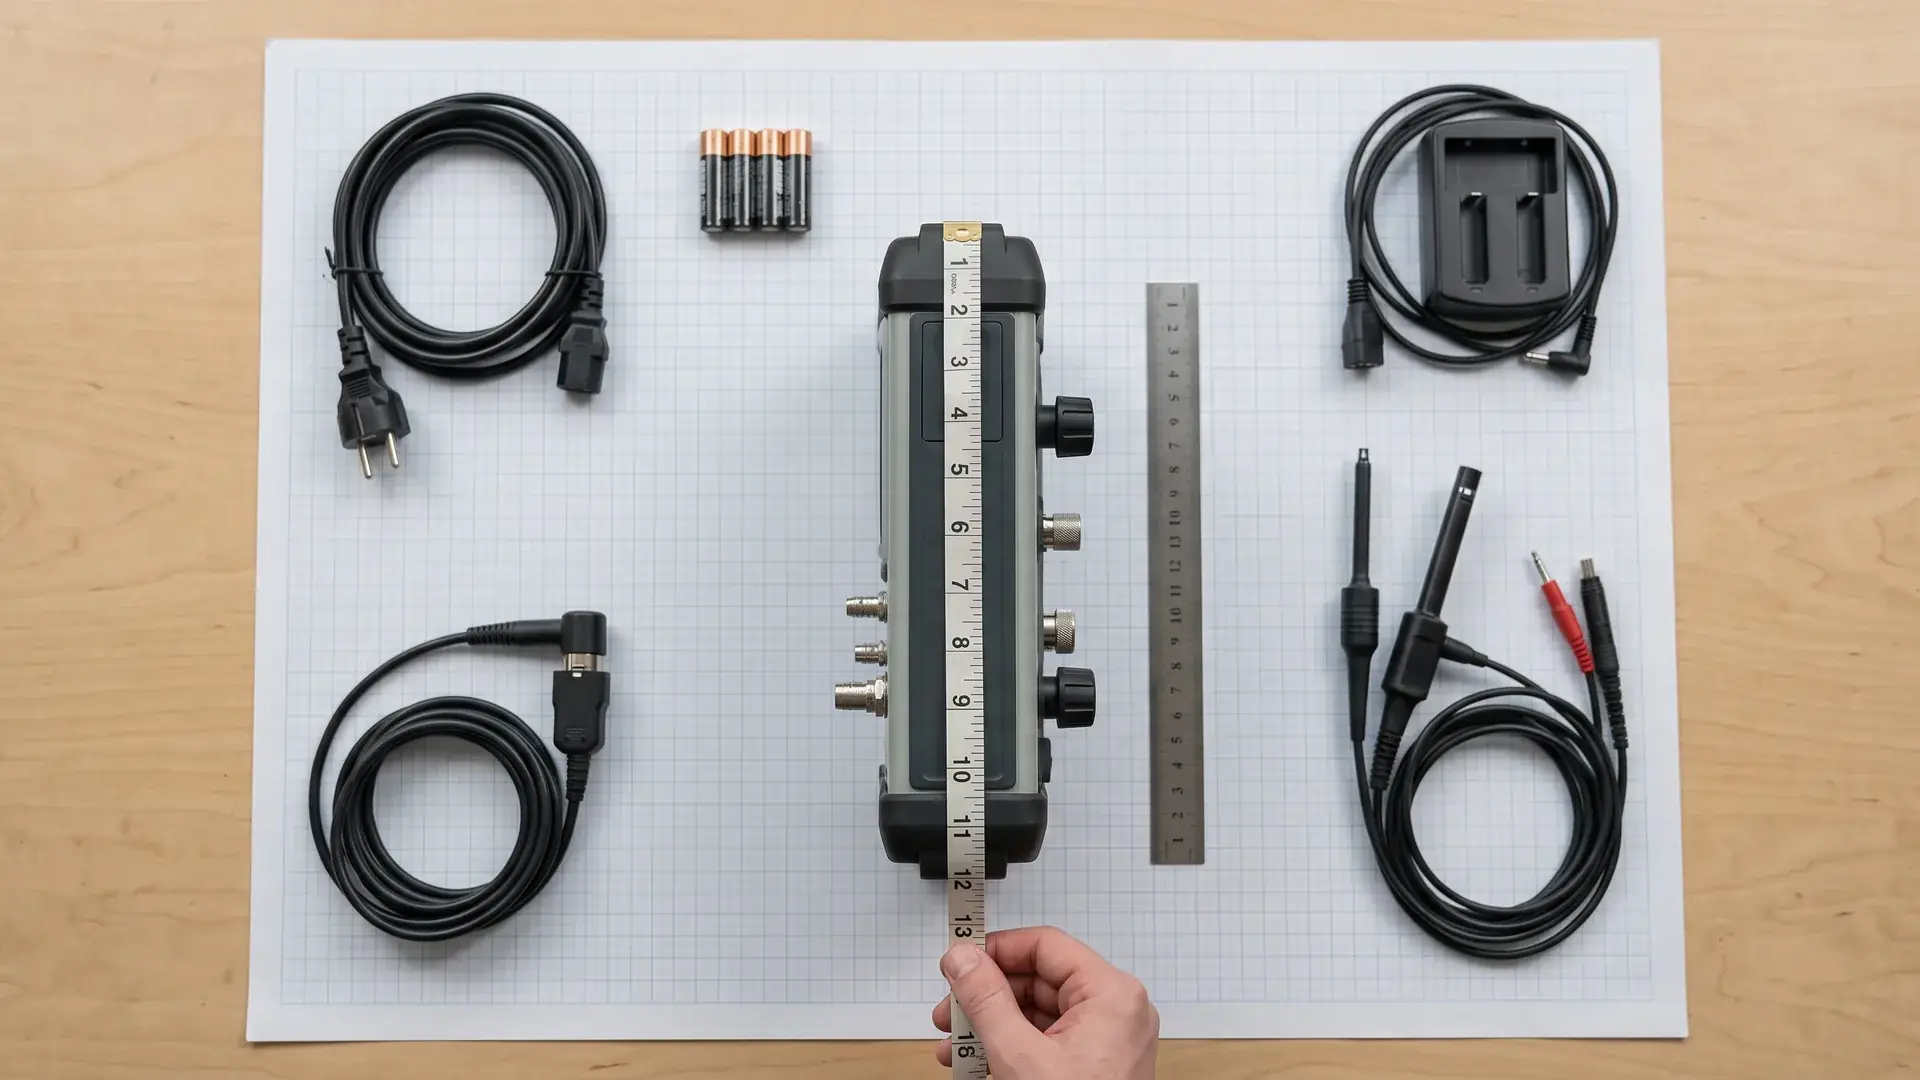
Before a supplier can build a stable protective carrying case, you need to hand over a clear transport-use specification. Vague RFQs produce vague samples. The inputs below are the minimum data set for meaningful quoting, pattern work, and foam or divider planning.
| Input category | Why it matters | What to confirm |
|---|---|---|
| Instrument geometry | Cavity size, lid clearance, and access path depend on real dimensions | Measured length, width, height including protrusions and open positions |
| Loaded weight | Foam firmness, handle structure, and zipper load all change with weight | Total weight with standard accessory kit, not the bare device |
| Sensitive surfaces | Determines foam type, lining, and divider separation | Screens, lenses, connector faces, calibration marks, painted surfaces |
| Carry method | Changes stress location and reinforcement needs | Hand-carry, shoulder strap, backpack-style, technician kit, nested case |
| Transport environment | Determines whether the case is a cover, organizer, or impact-buffer | Van, toolbox drawer, airline check-in, field bag, truck rack |
| Accessory list | Controls divider count, pocket size, and movement-control planning | Cables, probes, batteries, chargers, adapters, manuals |
| Packaging and channel | Controls carton protection, barcode placement, and internal pack-out | Retail box, distributor carton, replacement-part grouping, field pack |
Don't let a supplier guess any of these. A supplier can ask good questions, but the operational truth sits with you, the buyer.
Why Actual Instrument Measurements Matter More Than Product Category Names
"Multimeter case," "calibration kit bag," or "spectrometer travel case" sounds specific. It isn't. The same device family can differ substantially in width, height, protruding terminals, handle position, and rear connector layout. A divider case manufacturer works from dimensions, not labels.
Measure the instrument in its shipped or field-ready configuration. That includes probes connected, cables folded in the stored position, shoulder strap attached, or calibration knobs protruding. Record the longest, widest, and tallest points, not just the body shell. If you plan to store the device with a protective boot or removable stand, measure that version too.
Then think about lid compression. If your cavity is cut to the bare device height and the lid carries a foam layer, any protrusion may press against the lid, bow the shell, or load a screen. A workable rule: define the cavity clearance for the largest real configuration, then confirm with a loaded sample before approving bulk. The measured envelope, not the product category, drives that clearance.
Accessory Mapping and Divider-Zone Planning
Accessories cause movement damage when they are treated as afterthoughts. A heavy battery pack placed loose on top of a display becomes a pressure point. A sharp probe tip bouncing in a shared pocket scratches a lens over hundreds of transport cycles.
Plan accessory zones before finalizing the exterior design. Assign each accessory type a home:
- Batteries and power adapters in low, padded, or zippered zones away from screens and connector faces.
- Cables and probes coiled in narrow pockets so they cannot migrate into the instrument cavity.
- Chargers and manuals in flat lid or document zones instead of under the instrument.
- Small calibration adapters in segregated pouches, not floating loose with metal connectors.
The divider map should state where each weighted or sharp accessory sits relative to the instrument. That map becomes the visual standard for sample review. If the supplier cannot show it clearly in a fit photo, your bulk order is being built on a guess.
How Foam Density and Firmness Affect Equipment Protection
Foam has two jobs in an instrument carrying case: stop free movement and distribute forces across the right surfaces. Density and firmness help with different parts of that job, and they are not interchangeable terms.
Density is commonly expressed as PCF — pounds per cubic foot. Firmness or compression resistance is often discussed through ILD or analogous compression-force data in flexible foam. A low-density open-cell foam can feel soft and recover well under a light instrument, while a denser closed-cell foam supports a heavier unit but conforms less to delicate curves. Neither number alone predicts whether the case will protect your equipment.
This table frames the main foam categories the way a buyer should think about them:
| Foam type | Structure | Typical use condition | Protection characteristics | Moisture behavior | Sourcing considerations |
|---|---|---|---|---|---|
| Open-cell polyurethane foam | Soft, porous, air-permeable | Light delicate instruments, display units, light accessory kits | Conforms to curved surfaces, recovers after moderate load | Tends to absorb and retain moisture | Confirm cavity cut precision and whether it bottoms out under the full loaded weight |
| Closed-cell polyethylene foam | Denser plastic-like cell structure | Heavier equipment, field-service cases, higher repeated impact exposure | Distributes load, resists crush more than soft PU | Usually low water absorption, easier to wipe down | Confirm surface hardness and whether a softer lining is needed against scratch-prone surfaces |
| Anti-static or static-dissipative foam | Polymer foam with dissipative additives | Bare circuit boards, ESD-sensitive modules, electronics assembly or calibration parts | Primarily addresses static discharge, not impact | Depends on the foam base and surface treatment | Confirm actual static-decay or surface-resistance data instead of assuming color means protection |
| Cross-linked or rigid sheet foam | Firmer structural sheet | Semi-rigid dividers, lid stiffeners, heavy modular kits | Improves case shape and load spreading | Generally low moisture uptake, but confirm grade | Confirm hardness, edge finish, and cavity machining consistency |
Use the table as a discussion starter, not a finished spec. The supplier still needs your loaded weight and transport route.
PU Foam vs PE Foam for Instrument Carrying Cases
Open-cell PU foam is easier to compress around irregular shapes, which makes it attractive for delicate instruments and display surfaces. The trade-off is that it can bottom out under heavy accessories, retain moisture, and often requires a lining or coating to avoid surface friction. It also changes its protective feel when the loaded weight increases.
Closed-cell PE foam supports heavier equipment more effectively and is less moisture-sensitive, but it does not contour to fine geometry as easily. If the cavity is cut poorly, a rigid PE surface can create hard point loads against a screen or connector edge. Many well-executed cases solve this by using closed-cell foam for structural support and a thin softer layer, fabric, or low-friction lining at contact points.
The decision is not "PU is softer, PE is stronger." It's where the weight sits and which surface you are protecting. Ask the supplier to show the foam stack, not just a single material name.
When Anti-Static Foam May Be Required
Anti-static foam should only be specified when the equipment is genuinely ESD-sensitive: bare circuit boards, semiconductor-related modules, calibration electronics handled outside an enclosure, or components with an ESD-control requirement. A painted aluminum instrument housing in a foam case does not automatically need anti-static foam.
If your device or its assembly instructions call for ESD protection, ask for the supplier's foam static-dissipative data. A specific color or a verbal "it's anti-static" is not evidence. Confirm the test method, test condition, and whether the property is expected to remain stable over the product's storage life. This is one place where buyer-defined compliance requirements should override any marketing language.
Why Foam Density Alone Does Not Determine Protection Quality
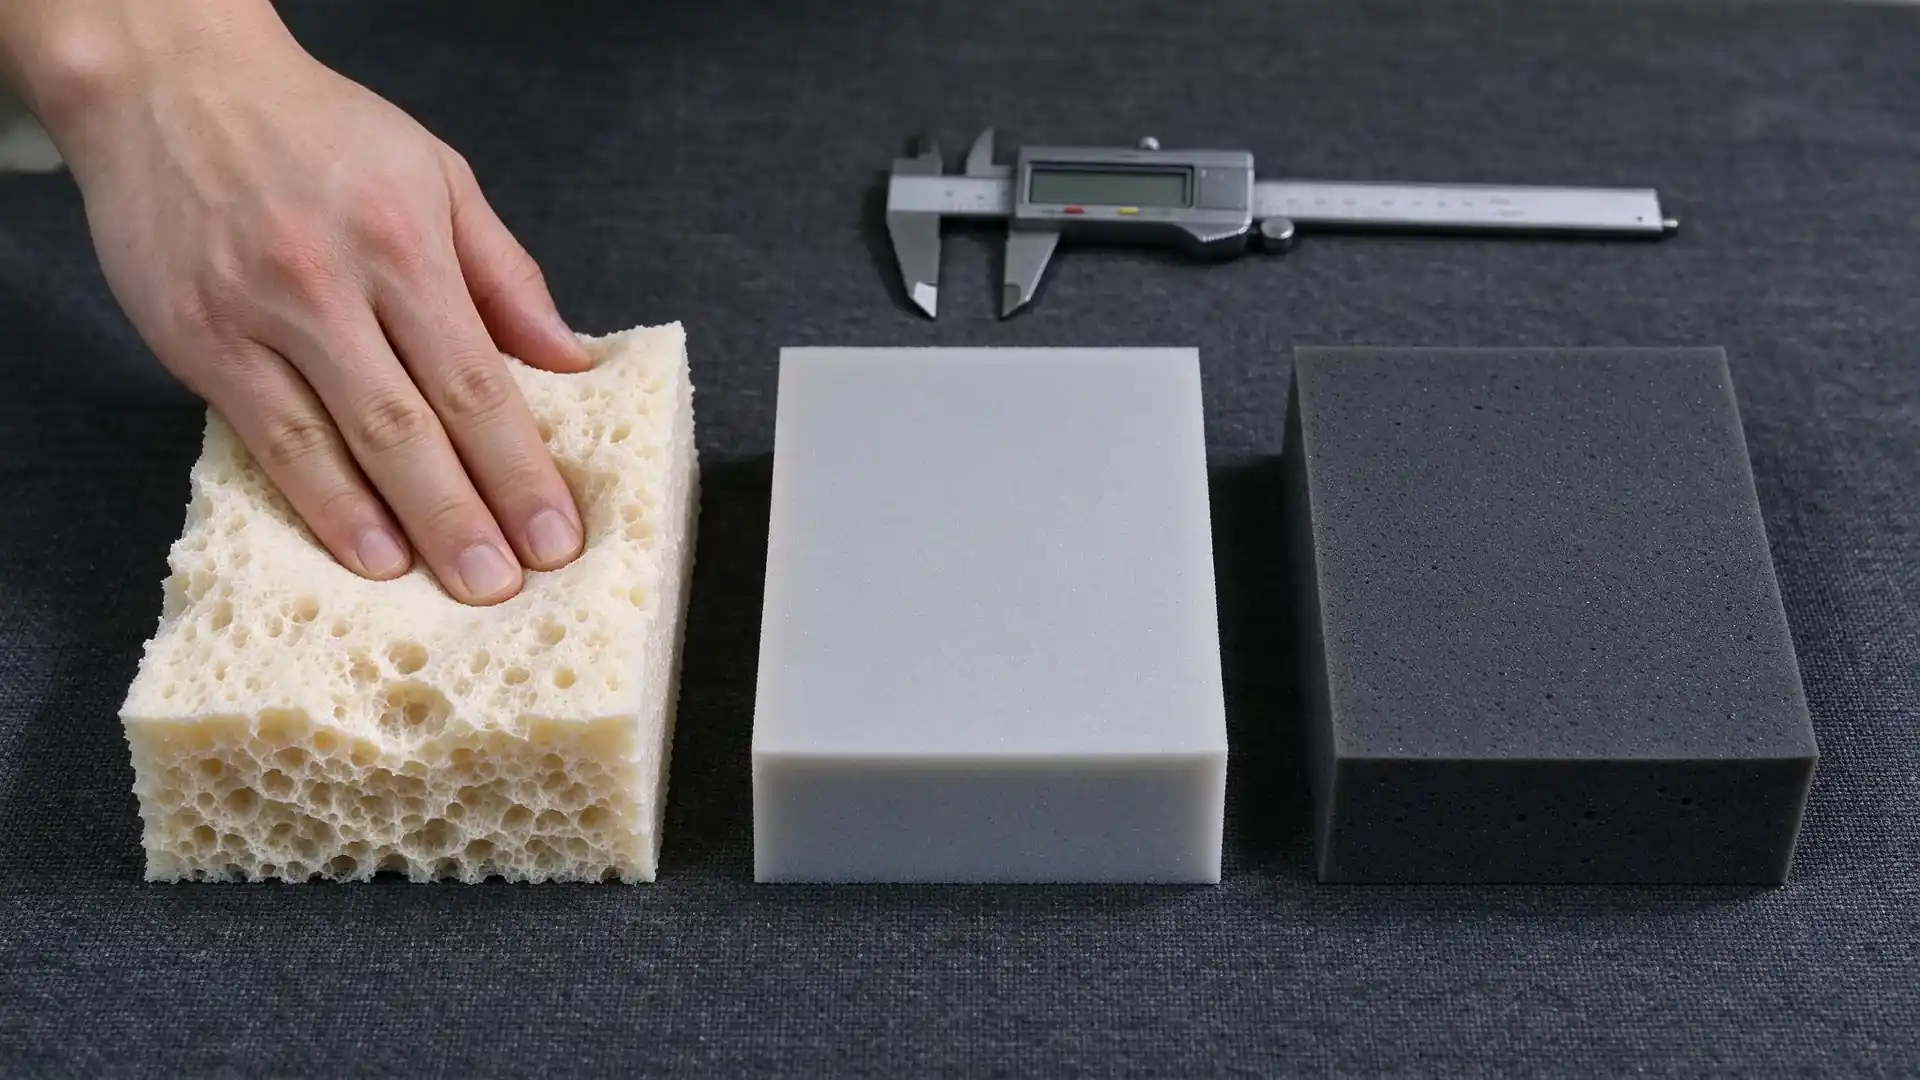
Density tells you how much material is present, not how it behaves under your specific load. A high-density foam can be stiff and unforgiving; a low-density foam can feel plush but collapse under a heavy instrument. The protection outcome comes from the interaction between foam type, cavity geometry, loaded weight, and carry route.
For example, a light handheld meter might sit well in a softer open-cell cavity. The same cavity used for a heavy calibration rig could let the device bottom out against the case shell, transferring road impact directly into the housing. Conversely, a dense PE cavity designed for a heavy unit may hold a light plastic device too rigidly, making insertion and removal feel forced.
This is why the sample step matters. A spec sheet can tell you foam class and density. Only a loaded sample shows whether the instrument settles, shifts, or compresses the foam in a way you can accept.
Divider Architecture and Internal Layout Risk Control
Internal layout determines whether equipment stays where you put it after the first bump, flight, or technician toss. The two main strategies are fixed foam-cut inserts and adjustable divider walls. Each has a different failure pattern, and the right choice depends on how often the kit changes and how carefully users repack it.
A foam insert case locks a specific item into a cavity. A divider case organizes zones but relies on the user not to drop heavy accessories into the wrong space. If your tooling or SKU count is stable, fixed foam often gives more repeatable protection. If field teams swap components, removable dividers may better support configuration changes.
| Factor | Foam insert case | Divider case |
|---|---|---|
| Movement control | Higher when cavities match the measured item | Moderate; depends on divider height, anchor method, and repacking discipline |
| Replacement flexibility | Lower; new instrument shape may require a new insert | Higher; dividers can be repositioned for new layouts |
| Accessory organization | Requires dedicated cutouts or pockets | Easier to create additional zones with hook-and-loop walls |
| Field-service suitability | Good for one standardized kit | Good for mixed or changing field kits |
| Sourcing risk | Higher pattern and cavity consistency risk | Higher risk if dividers shift or lose hook-and-loop grip under load |
Neither is universally better. State the intended use first, then choose the architecture.
Foam Insert Cases vs Divider Cases
Fixed foam suits a dedicated instrument that always travels with the same accessory set, especially when the buyer wants a branded, production-stable SKU. The cavity becomes part of the product identity. The risk is inventory: if the next instrument revision changes one dimension, the old insert may be scrapped. Confirm with your supplier whether the insert is replaceable as a separate component and what the tooling or cut-file implications are.
Divider systems work better when field teams carry varied kits or when product configuration is still changing. But not all dividers are equal. A divider panel that is too soft, too short, or only attached with weak hook-and-loop can fold over under load. When approving a divider case, demand a loaded access test and a divider movement check, not just a photo of an empty compartment grid.
How Heavy Accessories Can Damage Sensitive Components
A separate zippered pouch does not automatically prevent damage. The real danger is positional: heavy accessories stored above or beside a sensitive surface, then compressed by the lid or vibrated during transit. A battery pack in an overhead mesh pocket can press into a display when the case is stacked or carried at an angle.
Apply one movement-control rule: heavy items go low, sharp items go isolated, and sensitive surfaces face away from any loose accessory that could migrate. Then verify that rule in the sample with the case closed and lightly shaken. If the layout survives that, you have a practical baseline. If not, you need more partition height, a lidded inner pocket, or a different zone map.
Handle Reinforcement, Zipper Durability and Carrying Stress
Loaded cases fail at stress concentrations first: handle attachment, shoulder-strap anchor, zipper corner, and lid hinge. The engineering issue is rarely the outer fabric alone. It's whether the load path is reinforced and whether the closure can tolerate being opened while the case is at an awkward angle.
When you inspect an equipment carrying case sample, don't judge it flat on a table. Lift it by the loaded handle, open the zipper around the corner, and carry it the way a technician actually would. The failure-prone areas become obvious quickly.
How Handle Attachment Should Be Evaluated
A handle that feels fine on an empty case can pull through or tear stitches when the loaded weight bears on it. Ask to see how the handle is attached to the main panel. A robust path usually includes a webbing strap extending into a seam or anchored with reinforced bar tacks, sometimes backed by a plate or additional binding. You don't need to name the exact stitching machine; you need to verify the stress path.
The buyer-side test is a loaded lift. Specify the case be loaded with the representative kit, not a lighter substitute, and have the supplier show photos or video of the lift, the hand position, and the stitch area during the test. A single static lift is not enough for high-use field cases. Ask whether the attachment shows stitch creep, fabric puckering, or webbing shift after repeated handling. For a deeper mechanical explanation of why handles break, refer to the OMASKA breakdown of Why Suitcase Handles Break: Mechanism, Material, Structure & Testing Explained.
Why Zipper Route and Opening Angle Matter
The zipper is not just a closure — it's an access control. If the opening angle is too small relative to the instrument's largest dimension, users force the item in and out. That forcing loads the zipper tape, bends the slider, and can eventually stress the seam around the opening. If the zipper route turns too sharply around the corner, the slider must travel a high-friction path every time the case is opened.
On the sample, check three things: whether the instrument can be inserted and removed without scraping or forcing, whether the zipper travels the full route without catching at the corners, and whether the puller clears the case edge when the flap is folded back. The correct fix may be a longer opening, a radiused corner, a different zipper gauge, or a gusset change. Specifying a "heavy-duty zipper" without checking the route is a common way to buy the appearance of durability without the access geometry. You can trace the underlying failure logic in Why Zippers Break: Material, Design, Stitching & Quality Issues Explained.
Sample Testing and Approval Before Bulk Production
The sample is your best chance to freeze the relationship between the instrument, the foam or divider system, and the case structure. Approve a loaded sample, not an empty display sample. An empty case proves almost nothing about protection. It only proves the supplier can make the outside shape.
This is where buyers most often lose control. They approve a sample with one foam density, then the factory uses a lower-cost substitute in bulk. Or they verbally accept a small divider change, and the next production run arrives with a different layout. That loss of control is not unique to instrument cases; it follows the same sampling and revision breakdowns covered in Sample Order Mistakes in Bags and Luggage: What B2B Buyers Should Avoid Before Bulk Production. The fix is documented revision control: a dated specification record, the approved sample photos, the material confirmation, and the gold sample reference.
What a Pre-Production Sample Should Confirm
Use a checklist that ties the sample to the actual loaded kit:
- Instrument seated in the intended cavity without forcing
- Lid closed with acceptable clearance, no visible pressure mark on sensitive surfaces
- Accessory zones mapped as specified, with heavy items away from screens and connectors
- Instrument removed and reinserted without scraping zipper or shell
- Divider panels remain upright after a shake or short lift test
- Foam edges cleanly cut without loose debris on contact surfaces
- Full zipper route runs smoothly with no corner catching
- Handle attachment shows no stitch creep or webbing shift when lifted loaded
- Carton, polybag, barcode position, and replacement-part grouping shown for approval
- Loaded fit photos captured from top, side, and lid-closed views
Write the checklist into your sample instruction. Then require the supplier to respond to each line with a photo or a written confirmation. If the supplier hesitates on position-specific photos, treat that as a risk signal.
Common Sampling Mistakes That Cause Bulk-Order Disputes
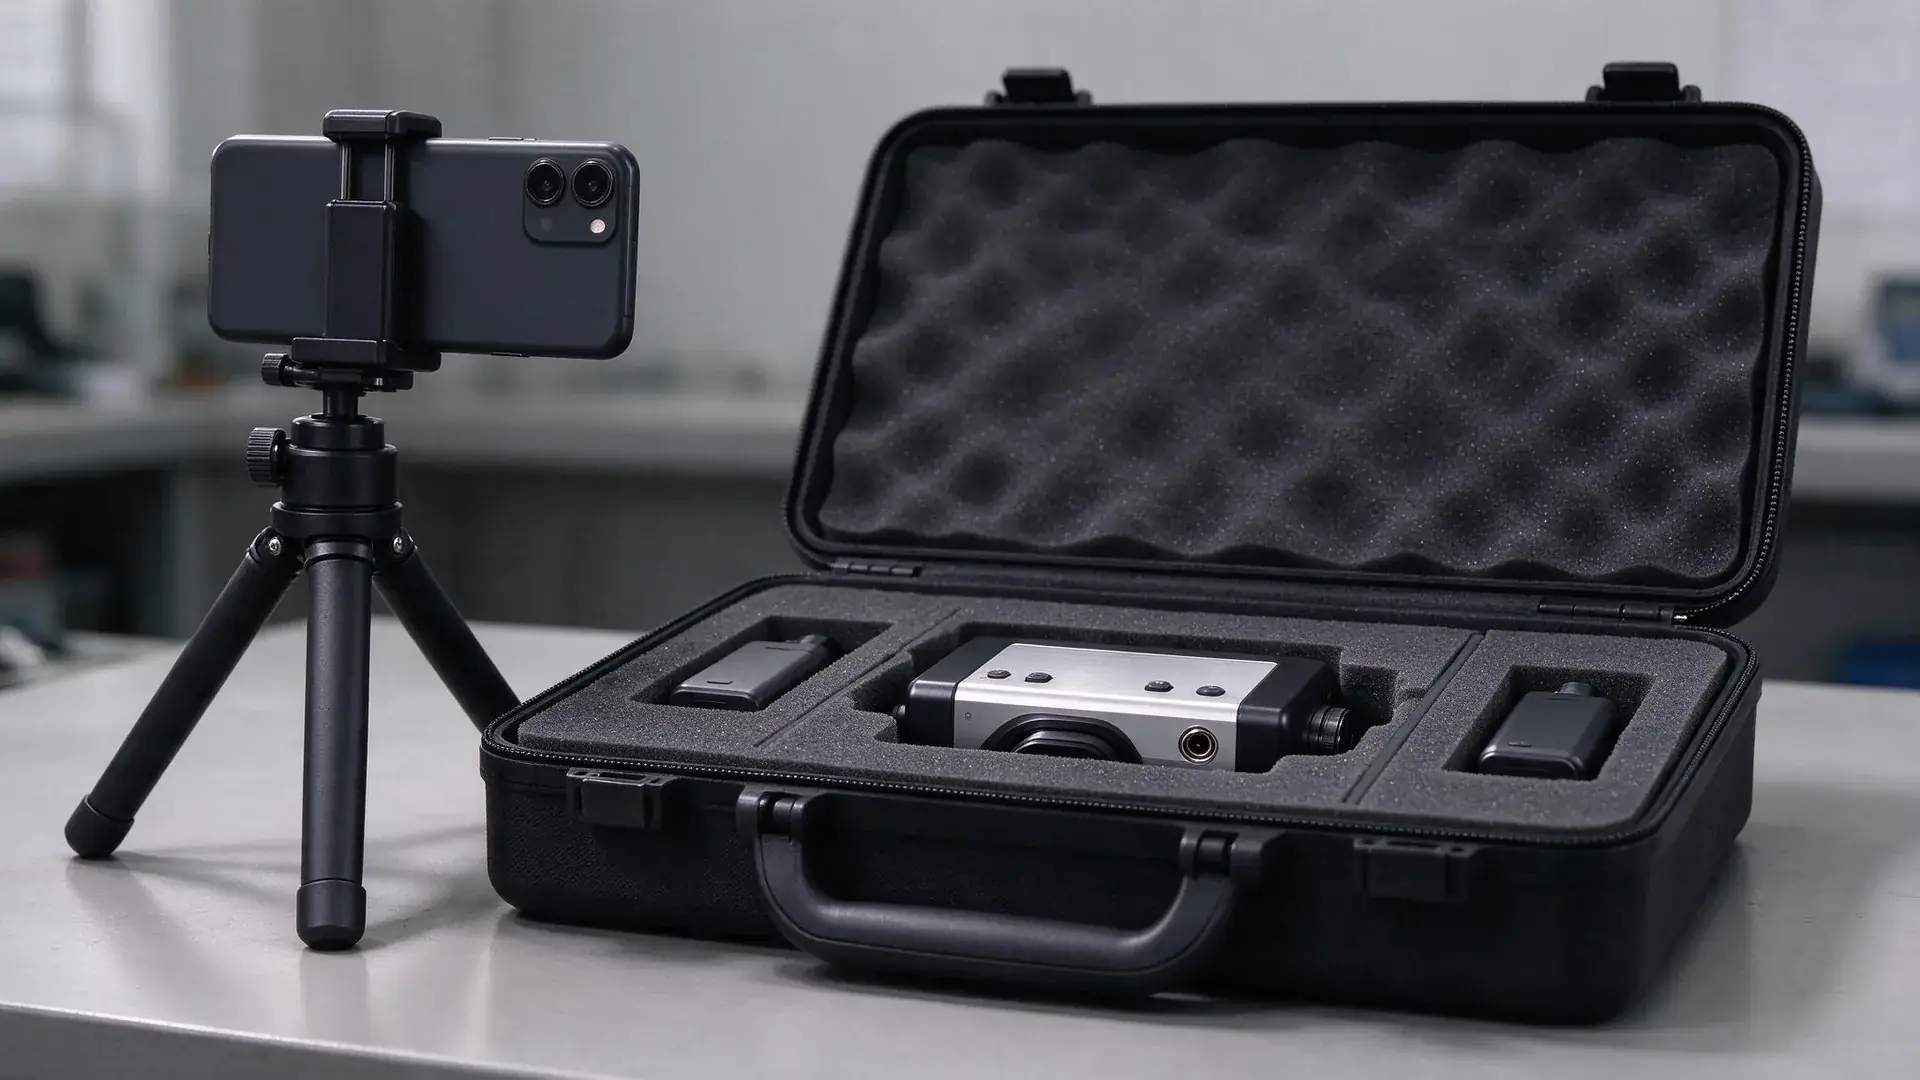
The worst sampling mistakes are quiet. You approve an acceptable sample, production changes something small, and months later the field cases don't fit the way the sample did. Common causes include:
- Approving an empty case instead of a loaded fit sample
- Sharing dimensions from a catalog sheet rather than the actual measured item
- Not recording foam density or firmness in the sample record
- Allowing a substitute foam, lining, or zipper without a revised approval
- Moving a divider or pocket verbally without re-checking the loaded layout
- Storing only the final bulk sample, not the intermediate fit evidence
- Ignoring the carton and barcode approval because "the bag is fine"
These are common reasons buyers end up in a dispute where the supplier insists the bulk product matches the approved factory sample, and the buyer knows the field performance is different. Use the documented approach covered in Bag Sample Approval Checklist for B2B Buyers: Verify Before Mass Production to close those gaps before they become freight claims.
Supplier Verification and Production Consistency Checks
Before you commit a bulk order, confirm who controls the critical decisions and how consistency is maintained run to run. A supplier that only sells an outside shape may not control the internal protection system.
Ask the supplier to walk through these points:
- Who owns the pattern, foam-cutting file, and bill of materials for your project?
- How are foam cavity dimensions repeated across production — template, machined cut, or manual trim?
- Which material technical data is supplied for foam density, firmness, and lining compatibility?
- How does the factory track revisions when the instrument dimension or accessory list changes?
- What is the pre-shipment inspection method — buyer-defined criteria, standard AQL, or fit-photo verification?
- Does the supplier retain a gold sample and a signed material confirmation record?
A responsible supplier should be able to answer these with documents, not adjectives. "We don't have that data" is not always a disqualifier, but it means your project needs more buyer-side control. A supplier that says "we can match anything" without asking for a loaded fit photo is more dangerous than one that says "we need to confirm that."
RFQ Checklist for Custom Instrument Carrying Case Projects
Send a structured RFQ so every supplier is pricing the same scope. The table below works as a buyer-facing input form.
| Field | Your input or options |
|---|---|
| Case type | Equipment carrying case, foam insert case, divider case, semi-rigid protective case, custom instrument bag |
| End use | Field service, calibration transport, demo kit, retail replacement, distributor package |
| Target market | Industrial, electronics, specialty equipment, online retail, distributor channel |
| Instrument description | Product name or neutral model description, photos, manual if available |
| Measured dimensions | Length × width × height including protrusions and stored accessories |
| Loaded weight | Complete kit weight with batteries, cables, probes, chargers, adapters |
| Sensitive surfaces | Screen, lens, connector, calibration mark, painted finish, removable cover |
| Foam preference | Open-cell PU, closed-cell PE, anti-static, liner requirement, density or firmness range if known |
| Internal layout | Fixed foam cavities, hook-and-loop dividers, hybrid arrangement, accessory zone map |
| Carry method | Hand-carry, shoulder strap, backpack, technician kit, nested in a larger case |
| Handle and closure | Handle type, attachment expectation, zipper route or flap preference, opening direction |
| Packaging | Retail box, polybag, barcode placement, carton strength, replacement-part grouping |
| Sample requirement | Loaded pre-production sample, fit photos, loaded access test, material confirmation |
| QC requirement | Buyer-defined checklist, AQL expectation, packaging and barcode inspection |
| Decision inputs | Sample deadline, bulk delivery target, revision-control requirement, destination route |
Do not leave sample deadline, inspection expectation, or accessory map blank in a supplier-ready RFQ. Those fields are exactly where misunderstanding converts into a costly sample round.
FAQ
These questions address the most common protection and sourcing decisions buyers need to clarify before a sample is cut. Actual answers depend on the instrument geometry, loaded weight, transport route, and the supplier's documented construction.
What is the best foam for an instrument carrying case?
There is no universal best foam. Open-cell polyurethane foam suits lighter, scratch-sensitive instruments that benefit from conformance; closed-cell polyethylene foam suits heavier equipment and more demanding transport routes because it resists crush and supports load. Pair the foam to the loaded weight, access frequency, and whether the equipment is ESD-sensitive. Confirm foam density, firmness, and any liner with the supplier using a loaded sample.
Are foam insert cases better than divider cases?
For a fixed instrument configuration, a foam insert case normally gives more repeatable movement control and a more production-stable brand SKU. For field-service kits that change between jobs or users, a divider case offers more reconfiguration flexibility. The better choice is the one matching your access and servicing pattern — not a generic "protective" preference.
How can buyers reduce transport damage risk before bulk production?
Measure the actual instrument and accessory set, including protrusions and sensitive surfaces. Specify total loaded weight and the carry route. Demand a loaded pre-production sample, then verify fit photos, lid clearance, divider movement, access without forcing, and zipper behavior. Freeze the approved construction with a gold sample and a signed revision record before bulk release.
What should buyers check during carrying-case sample approval?
Check the instrument fit with all standard accessories, lid clearance, foam compression marks, divider stability after a shake or lift, zipper route through the corners, handle attachment under load, and packaging or barcode placement. A sample checked empty is not a protective-case approval; it is an appearance approval.
When should anti-static foam be specified?
Only when the equipment or its internal modules are genuinely sensitive to electrostatic discharge — for example, bare circuit boards, uncovered connectors, or calibration electronics requiring ESD control. If the requirement exists, ask for static-dissipative test data and the applicable test condition. Do not treat foam color as proof of anti-static performance.
Official Sources and Compliance References
For most sourcing projects, you are not buying a certification; you are buying a documented material and construction decision. That said, two reference areas are worth keeping on the RFQ:
- Foam manufacturer technical data sheets for density, compression set, and any static-dissipative properties. Ask the supplier to match the project foam to a named material grade and provide the data sheet or physical-property summary.
- ATA Specification 300 or equivalent transport-case references when the customer's procurement document requires a defined reusable shipping case category. If referenced, confirm the latest issue and which category applies to your packaged equipment configuration. Do not allow a supplier to claim "ATA case" without showing the relevant document.
If your organization has internal drop, vibration, or packaging standards, include them as buyer-defined requirements. A supplier can help confirm feasibility, but the acceptance standard should come from the responsible product owner.
Conclusion
A strong instrument carrying case order comes down to control, not adjectives. Control the measured inputs, the internal architecture, the foam and reinforcement choices, and the approving evidence. Every ambiguous input — a category name, an unweighed kit, an unchecked divider, an unshown handle attachment — can become a future field-failure risk with your brand on the shell.
Before you commit to bulk production, do one thing: send the supplier a loaded sample requirement, not just an order. Ask for fit photos from the actual equipment and accessory set. Check access, lid clearance, divider movement, zipper route, and handle stress. If you cannot get loaded sample evidence, you likely do not have a protective case specification. You have a bag and a hope, and hope is the most expensive line item in B2B sourcing.
Get A Quote

Get A Quote
0 Comments